Monday, 28 August 2006

Today in the garden ... legume love

Meraviglia di Venezia ... latecomer to the party

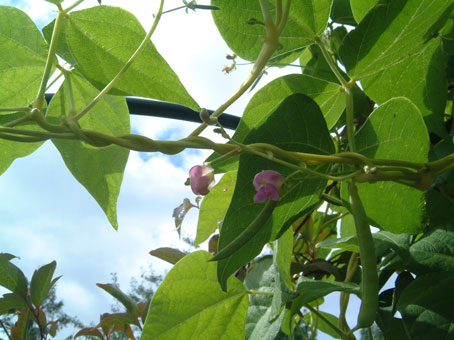
In all my progress reports on climbing beans, there's one variety I've barely mentioned since the early posts. Meraviglia di Venezia is an exceptionally late maturing variety (September/October is normal), and is only now starting to produce flowers and set pods. The one on the right in the photo is literally the first. It's pale green at the moment, but it will mature to a creamy golden yellow with wavy edges. When the beans eventually mature they will be shiny and charcoal black. Although it was one of the first beans I planted way back in early spring, and all the other beans have been podding like mad things throughout the summer, Meraviglia di Venezia initially put on a rampant scramble for the top of the fence (and over into next door's garden) and then remained resolutely committed to being a huge pile of leaves. When its season is right, however, it starts throwing out pods at a rate which make up for all the months of inactivity. It's a large plant with yellowy stems and lime green leaves which will elbow any other nearby plants out of the way. The flowers are pinky mauve and turn flesh pink as they mature; not the prettiest in the garden but decorative enough.

At last the first tomatoes are beginning to colour up (Pink Jester is the only one showing any interest in ripening). I was thinking I'd have to change the title of the blog to Daughter of the Unripe Tomato. They are very light-sensitive and as the weather has been so overcast throughout August they haven't been progressing as well as I'd hoped. They're still showing far more interest in spurting sideshoots from every available orifice than they are in ripening their existing fruit. They're even sprouting sideshoots from their fruit trusses, which is a bit daft. I've given them a good talking to. I've explained that they're not in their native South America now, they're in a cold damp country with a short growing season and they'd better get on with it.

But while the climate has not been kind to tomatoes it thoroughly suits the peas.

I've really fallen in love with pea plants this year. I never had much luck growing them in the past. They always had tiddly little pods with snail trails all over them ... the yields never seemed worth the effort or the growing space. All the varieties I grew were conventional ones whose growth habit is short and bushy and which ripen all together ... which is great if you're a commercial grower and you want to mow the lot with a tractor, but has no advantage to gardeners. The real revelation has been trying the Victorian tall peas for the first time. Their yields and their beauty don't bear comparison with a modern commercial pea.

I'll definitely be trying more tall heritage peas next year. Alderman is part of a group of 5-8ft tall voluptuous peas known as the Telephone group. Telephone may sound like a strange thing to call a group of peas, but probably didn't seem so in the context of the time. It would be a bit like having a new pea variety today called iPod.

I've found that Franchi Sementi do a variety of tall pea called Telefono, which is presumably related. It looks very like Alderman if the picture on the packet is anything to go by. But if it's been grown in Italy for any length of time it will be a sub-strain, and it'll be interesting to compare it with British versions of the Telephone peas. (Any excuse to buy another packet of seeds.)

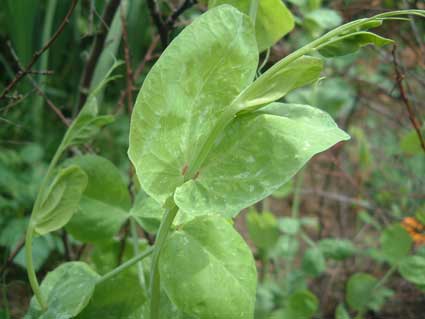
Ezetha's Krombek Blauwschok, of pre-1882 vintage, showing a ring of purple in the leaf axils. All the purple-podded varieties seem to have this, and the yellow-podded Golden Sweet has a larger double ring.

Meanwhile I've planted out all of my F1 hybrid experimental peas. They have only a trace of purple in the leaf axils ... less than the full-blooded purple-podded, but I should see a lot more purple in the next generation if I can get them to seed.

My latest crop of Alderman has just started flowering, and is thriving in the manky cloudy weather. Ezetha's Krombek Blauwschok is not far behind. I have high hopes of a bountiful pea-fest this autumn.

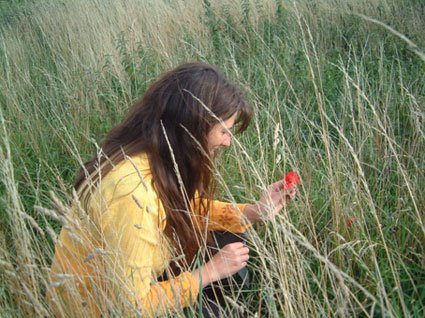
In addition to having a lovely garden, I'm lucky enough to live among some of the finest countryside England has to offer and I love going out for walks in the hills which surround Cheltenham in a semi-circle (and provide it with its pleasant microclimate).

My husband is used to it by now ... every time we go out for walks anywhere I'm constantly diving into the undergrowth to look at plants.

And this is what I was so interested in. It's a common British field poppy, Papaver rhoeas, but a very special one with dark red stripey veins. My eye was initially caught by its unusually intense colour, but the extraordinary flame-like pattern was an amazing find. I feel very privileged to have seen it.

Friday, 25 August 2006

A seed saver's guide


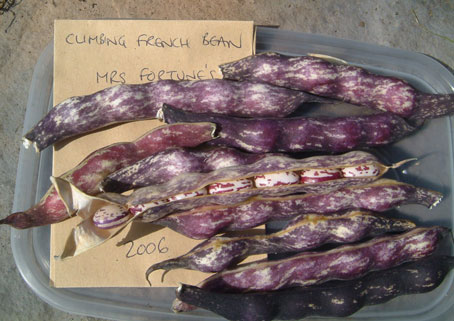
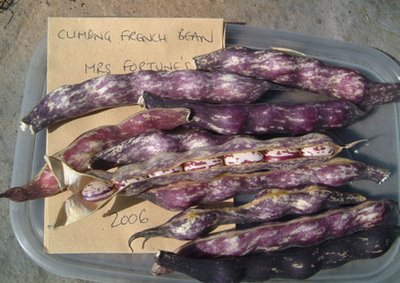
Since we're getting into that time of year again, I thought it might be useful to put together a quick and simple guide to vegetable seed saving, since this sort of info is rarely found in gardening books. Most things can be home-saved, and it not only saves money but helps to maintain long-term biodiversity. As more and more traditional open-pollinated varieties disappear from the catalogues to be replaced by overpriced and overhyped hybrids, you could find yourself looking after a variety that's no longer available and helping to keep it from extinction. Like the lovely maroon and white beans shown above, an heirloom variety which is unavailable to buy.

When you save seed from year to year though, things can get more complicated. If you've read my post about F1 hybrids you may remember that plants fall into two basic types when it comes to reproducing. Inbreeders are happy to self-pollinate to kingdom come and show no ill-effects from it. Seed from a single plant, or even a single pod, can be enough to keep the variety going. Outbreeders are designed to cross-pollinate with other plants and need lots of genetic diversity. Without it they succumb to inbreeding depression ... within a few generations they start to lose their health and vigour. To avoid this you need to save seed from a number of plants, not just one or two. They will also often cross-pollinate with other compatible plants growing nearby so if you want to keep a variety true from seed you may need to isolate them from other similar crops.

So isn't it more hassle than it's worth to save seed from outbreeding crops? Not really, no. Because over the years you'll be selecting seed from the plants which grow best in your garden, and will gradually develop your own sub-strain which is optimised for your growing conditions. For this reason home-saved seed often does better than the stuff you buy (in America, commercial seed may have originated in a different zone with very different conditions ... while most seed sold in the UK is not produced in the UK at all).

F1 hybrid plants sometimes produce sterile seed, or no seed at all. And when they do produce viable seed it doesn't come true to type. The usual advice is not to save seed from F1 hybrids. If you're interested in plant breeding though, or just enjoy the element of surprise, you can ignore that advice. The resulting plants may turn out nothing like the parents, and may initially be inferior, but you'll have all sorts of brand new and possibly unique genetic combinations to choose from, and you're a step closer to producing a new open-pollinated variety.

Storage of seed is a whole subject in itself, but for year-to-year seed saving (as opposed to long-term storage) you can just dry them out as much as you can and store them in paper envelopes. I usually place each envelope inside a self-seal bag too.

OK, here we go:

Beans, French
Leave the pods on the vines for as long as possible, until they are dry or at least until they start to change colour. Then harvest them and dry them out further indoors. To hasten drying you can split the pods open, but try to leave the beans attached. When the pods are dry and brittle, shell out the beans.

Pollination issues: Strongly inbreeding and self-pollinating, so you can save seed from a small number of plants and grow different varieties close together with no problems.

Beans, Runner
Same method as for French beans.

Pollination issues: A rampant cross-pollinator, so keeping varieties true to type is almost impossible on allotments and where neighbours are growing them. If you need to keep them pure, hand-pollinate and bag up individual flower clusters to keep the bees out. If you're not bothered by a bit of genetic diversity though, don't worry about it.

Beetroot and chard
Beets and chards are biennial and normally go to seed in their second year. The seeds grow on long straggly spikes and take ages to mature. You can pick them off individually as they turn brown, or wait until they're nearly all brown, cut the whole spikes and run a gloved hand along them.

Pollination issues: Strongly outbreeding ... grow at least 16 plants to keep a healthy diversity. Beetroot, chard and leaf beet will all cross-pollinate with each other! To avoid this, grow only one type for seed at any one time. The pollen can travel up to five miles, so if purity is essential you'll need to bag up individual flower spikes.

Brassicas
Not the easiest to save for seed. Most flower in the second season. The long thin seed pods fall to bits very readily when they're ripe, and are likely to be ransacked by birds. The easiest solution is to cut the flower stalks as soon as they reach maturity and hang them upsidedown indoors with a paper bag over them to catch the little round seeds as they fall from the pods.

Pollination issues: Strongly outbreeding ... most can't self-pollinate and are prone to inbreeding depression. You really need to grow around 20 plants, if you have the space. They also cross-pollinate like mad, so isolation is needed to keep varieties true.

Garlic
Garlic is a plant that no longer bothers to set seed in the conventional sense. It's normally propagated by dividing and replanting the cloves. Save healthy bulbs from the regular harvest and leave them intact until planting time (autumn).

If you allow garlic to flower it will produce a huge number of bulbils in the flower head instead of seed. These are essentially miniature cloves and can be saved for planting. They take two years to produce full-size bulbs, but have the advantage that they're less likely to carry diseases. Cross-pollination is not an issue because the bulbils are produced asexually and are therefore genetically identical to the parent plant.

Lettuce
Seeds produce little white tufts, like thistles, when they're mature. They tend to mature at different times, so collect them regularly as they ripen. Allow them to dry indoors until very brittle then rub off and remove the fluffy tufts.

Pollination issues: Inbreeding. Seed can be saved from just one or two plants. They don't usually cross-pollinate, but to be on the safe side grow different varieties a few feet apart.

Onions and leeks
Flowering in the second year, onions and leeks produce beautiful spherical seedheads. Allow them to ripen until the seed capsules start to go pale and papery (they will probably all mature at different times), then cut the flower head and hang it upsidedown in a paper bag in a dry place.

Pollination issues: Strongly outbreeding, and need plenty of pollination partners ... try to grow at least 16 plants. Onions and leeks will readily cross-pollinate with others of their own type but not with each other, though onions may cross with shallots. To maintain pure varieties grow only one type for seed at any one time (you can still grow other varieties for eating, since those won't be flowering).

Peas
Same as for beans really; allow the pods to dry for as long as possible on the plant and shell them out when the pods are brown and crisp.

Pollination issues: Strongly inbreeding, so there are no problems with saving seed from just a few pods, and they're unlikely to cross-pollinate even when grown close together.

Potatoes
To save tubers for next year's crop, select them at harvest time and keep them in a cool, dark, frost-free place over winter. Select only firm and healthy tubers, which ideally should be about the size of a hen's egg. Leave them in a bright sunny place for a few days before storing them, which helps to toughen the skins and keep them dormant. Check them from time to time over the winter and chuck out any that are going soft or mouldy.

Some potato varieties will set top fruit which contain true seeds, and these can be saved too. If your plants have produced "apples", collect them when they're just starting to soften and are ready to drop from the plant. Process them in the same way as tomatoes (though the stinky fermentation process shouldn't be necessary ... just wash them thoroughly in a sieve to remove the pulp).

Pollination issues: Potato flowers cross-pollinate fairly readily, but in practice so few of them produce viable pollen it's unlikely to be an issue. Even when self-pollinated though, they will not come true from seed (because they have a slightly eccentric arrangement of chromosomes). Each one you plant will be effectively a new variety. Conversely, plants grown from tubers are genetically identical to the parent plant.

Squash (pumpkins, marrows etc)
The seeds are so huge you can't miss 'em. It's usually best to leave the fruits to ripen for a few weeks after harvest before collecting the seeds, or just leave them until you're cutting them up for eating. Wash the seeds to remove bits of pulp and fibre, then spread them out on a plate to dry thoroughly.

Pollination issues: Outbreeding, and will cross-pollinate with any other squash of the same species. Unlike most outbreeders though, it's not prone to inbreeding depression ... so you can get away with saving seed from just a few plants ... 6 or so will do.

Sweetcorn
Saving seed from sweetcorn is not really practical unless you have room to grow a lot of it!

Leave the cob (ear) on the plant for as long as possible or harvest when it's mature and bring it indoors to dry. When it's completely dry, the kernels can be removed by rubbing two cobs together.

Pollination issues: Extremely outbreeding! More prone to inbreeding depression than just about any other vegetable, and even sowing just one generation of inbred plants can result in an inferior crop. To be sure of maintaining health and vigour you need to grow and keep seeds from about 200 plants. Gulp.

Sweetcorn is wind-pollinated and produces stupendous amounts of pollen which is then cast to the four winds. To keep a variety pure it needs to be isolated from other varieties by some considerable distance.

Tomatoes
The 'proper' way to save tomato seeds is to scrape the seeds (including the gooey gel stuff) from ripe fruits into a small container, maybe add a tiny splosh of water, and leave it to ferment for a few days. During this time it will produce a crust of disgusting mould and a stench which could put you off tomatoes for life. When all the gel has dissolved away, rinse the seeds thoroughly in a sieve under running water and then leave them to dry for several days. Stir them around regularly to prevent them sticking together.

An alternative and much less stinky method is to scrape the seeds out onto a sheet of kitchen roll, spread them out to separate them and leave them to dry. The gel acts as a glue and sticks them to the sheet. I've heard this method criticised because the gel also acts as a germination inhibitor ... but in my experience the seeds germinate fine, even after several years.

Pollination issues: Strongly inbreeding. Saving a single fruit is enough, although more is better. Cross-pollination can happen but usually doesn't. If you want to be sure of pure varieties, isolate the plants from other types as far as you can.
Today in the garden ... smugness

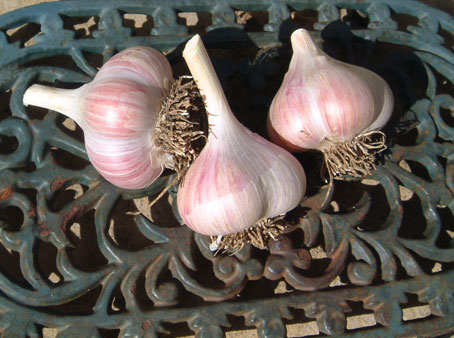
I'm well proud of this year's crop of garlic ... this variety, appropriately enough, is called Music.

This year I experimented with a different method of growing garlic. It seems to have paid off too, if this crop of Music is anything to go by, grown from cloves saved from last year's crop. They look just like shop-bought bulbs and they taste phenomenal. I've also had very positive feedback from the people I've given them away to. Music is a continental-type, which has a slightly different bulb structure from 'normal' garlic. It has between two and five very large fat cloves, which only keep for a few months but taste exceptional. I suppose its relatively short shelf life is the reason you don't often see it in the supermarkets, but it's worth seeking out.

The definitive book about garlic has got to be Ron L. Engeland's Growing Great Garlic, which is written with the expertise of someone who makes a living from garlic farming and the passion of someone who genuinely loves and respects the plants. It's a wonderful book. And one of the things he describes is how he grows his garlic in low ridges, a bit like potatoes, rather than the conventional planting in flat ground. I don't know why this should work any better, but I thought if that's what Ron does with his own plants then I'd like to try it too, and it does seem to have produced some beautiful results.

They were grown in ground which hadn't been manured, and I didn't feed them much ... they don't seem to need it. They just got watered during very dry weather. Another tip I picked up from the fruits of Ron's experiments is removing the flower scape at a later stage than is normally recommended. He suggests leaving it until it forms a loop-the-loop, so that's what I did. Logic would suggest that leaving the flower to develop to that extent just wastes energy that would otherwise go into forming the bulbs ... but as you can see, they've come out plump and perfect.


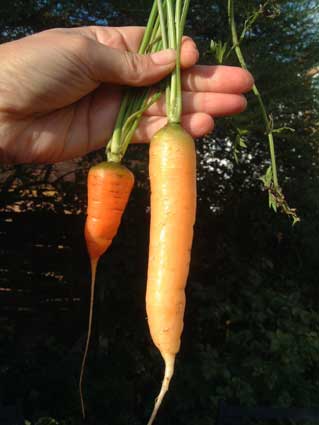
I'm also succumbing to carrot smugness having harvested these two beauties. The only downside is that this is the entire crop, for the moment at least. I do have others still in the ground but they look more like pipecleaners. However, I'm smug anyway because this is the first time I've ever successfully grown a carrot, having been trying on and off since my parents first let me take over a section of their garden in the late 70s. Yes, the one on the left is supposed to be small and wedge-shaped, it's a Chantenay, a French variety which has been around since 1830 and is still one of the best-flavoured ... there's even an official website devoted to it. The one on the right is a light orange specimen from the mixture which Chase Organics sell as Rainbow Carrots. Others will allegedly turn out mauve, purple or white, though at this rate I may need a magnifying glass to see them.

These two carrots came out flawless and tasted wonderful.

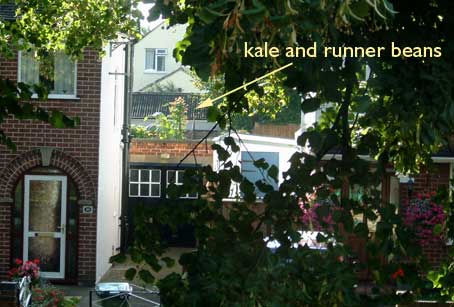
Despite the wonderfulness in my own garden, I can't help gazing in awe across the road at the old geezer's runner beans which are visible by virtue of being about 8ft tall. And he's also got something else unbelievably enormous growing in front of it ... looks like some kind of kale. God, aren't I nosey?


And lastly, an update on my pea-breeding experiment. The first of my F1 hybrids (Alderman x Mr Bethell's Purple Podded) is in the ground and growing like a rocket. Peas shouldn't really display hybrid vigour, because inbreeding plants generally don't, but it's certainly got some vigour from somewhere. I have eight more growing in bog-roll tubes waiting to be planted out ... they've all germinated but some are a bit small as yet. For some reason the hybrid seeds have been ridiculously slow to germinate, so I'm going to have to hope for nice weather this autumn to bring them to maturity. The good news though is that they are all showing faint streaks of purple on the early leaves. They may or may not turn out to have purple pods (it doesn't matter anyway with the F1 generation ... it's the subsequent generations I'll be selecting from to get my new variety) but the main thing is that they all have the crucial gene that enables them to produce purple.

Gallery of horticultural shame

It's always nice to put up photos of pretty flowers and voluptuous produce, but just in case anybody was getting the impression that my garden is all beauty and bounty or that I know how to grow everything, I'm going to own up to a few things you don't normally see on the blog.

Basil is my favourite herb, but I can't grow the bloody stuff to save my life. This is my current crop of finest Italian purple, Basilico Violetto Aromatico. If anyone can suggest any tips for how to grow it I'd be grateful to hear them.

A several-months-old San Marzano tomato plant. Mm, something tells me this one isn't going to produce ripe fruit before the first frosts.

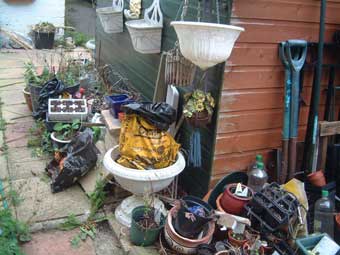
The godawful mess down the side of the shed ... and this is after I tidied it.

Sweet William

Tuesday, 22 August 2006

How to hybridise tomatoes

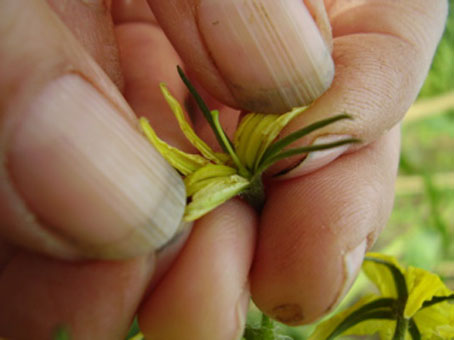
Emasculated tomato flower (in this case Tangella) with the anther cone removed, leaving just the outer ring of petals and the central pistil.

What more exciting project could a gardener wish for than to breed your own unique tomatoes? Many of the heirloom varieties and some of the long-standing catalogue favourites were originally bred by curious amateurs. And why not? All you need is a bit of patience and the easily learned skill of hand-pollination.

As with most things in the garden, there's a "proper" way to do it and an "oh sod it that'll do" way. I admit I tend towards the latter. So the method described here is slightly less complicated than some of the other pollination guides I've found on the net. But it really doesn't need to be complicated if you're doing it on a garden scale rather than a commercial one.

Compared with peas, hand-pollinating tomatoes is quite simple. The flower structure is very basic. But there are a couple of practical issues which make it less easy: the flowers are smaller, so you need good eyesight and/or a magnifying glass to see what you're doing, and the pistil is fragile and easily damaged. Unlike peas, where the pistil is quite bendy and robust, tomato pistils easily snap off or get kinked. So don't feel bad if you ruin a few flowers before you get the hang of it. The plants won't mind ... they'll just produce new ones.

Hybridising tomatoes is a two stage process: emasculation (removing the male bits) and pollination (introducing male bits from a different variety).

Tomato flowers have a layer of petals which open out fully when the flower matures, and a yellow cone in the centre which is formed from the anthers (pollen sacs) which are fused together. Inside the cone is the pistil: the long green stalk which carries the all important stigma at its tip. The norm for tomatoes is perfect self-pollination. Pollen is shed on the inside of the cone and falls straight onto the stigma. There are no bees needed, and the stigma may never be exposed to the outside world. To hand-pollinate a tomato flower, you need to stop this from happening by removing the anthers before they shed pollen.

These two buds both make good pollination candidates, subject to the variety and weather. The open flower on the right is at a good stage for pollen collection.

In an ideal world you would do your pollinations on the first few trusses that form on the plant, and use the first buds on each cyme. But any good-sized healthy bud will do the job. The important thing is to identify them at the right stage. Tomatoes normally self-pollinate at around the time when the petals open, so choose buds which are just starting to colour up, with the sepals (but not the petals) just opening. The exact time will depend on the weather, because they are reluctant to shed pollen if it's cool or wet but begin shedding it rapidly when the sun comes out. It's best to do the emasculation when the weather is cool and overcast.

My tool for tomato pollination is my artist's scalpel (and a cheapie one at that). People who do this commercially use pointy-tipped forceps, but most gardeners don't have things like that lying around in their sheds. Any small blade will do, as long as you clean it each time you poke it into a flower. I just wipe it on whatever I've got handy (my clothing has been known) and nip into the house to wash my hands before moving on to a plant of a different variety. As long as you're conscious of the risk of contaminating your hybrids with stray pollen and take reasonable care not to, you shouldn't have a problem.

Use the scalpel to prise the segments of anther cone open

Having selected your bud, open out the petals to reveal the cone inside. The petals usually open quite readily and stay out of the way. Using the tip of the scalpel blade, prise the tip of the anther cone open just far enough that you can grab a segment of it with your fingernails, then peel it down to the bottom and pull it off. Remove all the segments so that you're left with just the long green pistil in the centre (see below).

Open the anther cone completely and pull off all the segments so that you're left with the green pistil (notice the bobbly stigma at its tip). Eww, look at the state of my fingertips. That's what playing the mandolin does for you. Like strumming a cheesegrater.

You can use the scalpel to remove the segments of anther if you prefer, but try not to poke it into the anther itself or it may spill some pollen. The aim is to remove the anthers without breaking them so that no pollen is shed. You should also have a look at them to make sure they aren't already shedding any; if you can see traces of yellowish-white dust then it's too late to do the cross and you'll have to try again with a slightly younger bud (or on a day when the weather is cooler and damper).

The other thing you will have to watch for is not to damage the pistil. In some varieties, especially older ones, the stigma is flush with or actually sticking out from the anther cone. In other cases the pistil is very small and thin and tightly snuggled within the anthers. Either way you will have to take care not to rip it off along with the anther segments. You will get better at this with practice but will probably end up ruining the occasional flower no matter how many times you do it!

OK, so that's the mother bud sorted out. The stigma is normally receptive a day or so before any pollen is shed, so in most cases you can get on and do the second stage of the process (pollination) straight away. The stigma tends to go somewhat bobbly and blobby when it's receptive, but it's more apparent in some varieties than others. It should certainly be free of any obvious traces of pollen. Once you've done a few pollinations you'll learn to see when the stigma is clean and receptive. Some tomato breeders leave the pollination until the next day to give the stigma more time to mature, others just get on with it. Better still, if you have the patience, is to do both. I've found that carrying out the pollination two or three times on different days increases the chances of it taking successfully.

Now you need to collect some pollen from the plant you're using as the other parent. For this you'll need to find a flower that's recently opened and pull off a segment of the anther cone. The anthers take the form of plump yellow sacs, which split along the seams when they're ripe so that the pollen is sprinkled out through fine slits. It's not always very abundant though, and it's also very fine and easily blows away! Most ripe flowers will usually have some pollen to spare though. The easiest way to collect it is to scrape the blade along the length of the anther a couple of times in one direction. It's quite a pale coloured pollen, and exceptionally long lived. Sometimes there's a small 'pool' of pollen towards the tip of the cone if it's already been shed. If it hasn't been shed yet you may have to extract some from the sac itself by slitting it open and scraping out the contents onto the scalpel blade.

Then take the pollen-laden scalpel to the mother plant (watch the pollen doesn't blow away en route) and dab it very lightly and gently on the stigma. If the stigma is a reasonable size and/or you use a magnifying lens you should be able to see the grains of pollen clinging to it.

And that's about it really. The flower may look a bit silly, being just a stigma in the middle of a ring of petals, but it generally doesn't need to be taped shut or protected with anything. The risk of contamination with stray pollen is low, since there's nothing to attract any insects to it, and there shouldn't be any problem with the stigma drying out as long as the weather is not too hot and dry. So you can just leave it to get on with it, and it's readily accessible if you want to give it a second dose of pollen the following day.

Sometimes when you try to pull the anthers off a mature flower to collect the pollen the entire flower face comes off – petals, anthers, the works – leaving behind only the pistil. You can often use the whole thing just as it is by placing it over the pistil of the emasculated mother bud. A kind of flower transplant. It only really works if the two plants have flowers of a similar size, and you may also need to tie a piece of cotton thread or wrap a tube of masking tape around it to hold it in place. My experience is that it's quite an effective way to get good pollination, but I'm much more likely to snap the pistil off in the process ... and that means starting all over again.

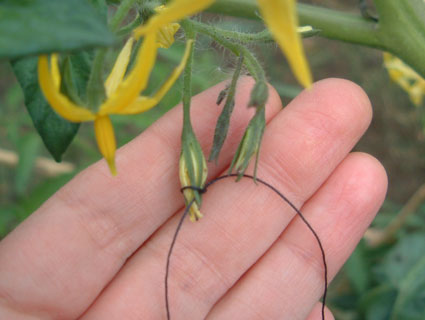
Pollinated bud clamped shut by tying a cotton thread around it in a single knot, not too tight. You don't need to do this unless you're trying to hold a "flower transplant" in place, or it's very hot and dry and you're worried about the stigma getting dessicated.

After pollination you have to wait for several days before you can see whether it's worked (unless the bud falls off, which is a pretty unambiguous negative). With a bit of luck you'll start to see some swelling at the base of the pistil and before you know it there's a tiddly green tomato emerging. You will almost certainly find that not all your efforts are successful. This is normal. Hand-pollination is rarely 100% effective, and it's best to do several buds to allow for some failures.

One thing I haven't mentioned is how to choose which tomatoes to hybridise. To some extent that's part of the fun. You can design your own ideal tomato by deciding which characteristics you'd like and breeding together two varieties which most closely bring together the traits you want. Or you can just hybridise whatever you happen to have flowering in the garden and see what you end up with.

If you want to breed a new variety which you can select from and continue to grow in the future, you'll need to start with open-pollinated varieties (i.e. ones that come true from seed). Most tomatoes are ... just avoid any that are already F1 hybrids. The seed you produce from your cross will be a new F1 hybrid, and all the plants from it will be very uniform. When you allow that generation of plants to self-pollinate you will get F2 hybrid seed, whose plants will show a range of different characteristics as the mixed up genes of the two original parents start to separate out. At that stage you can select the characteristics you want for your new variety.

How long it takes to create a new true-breeding variety depends on the genes involved, whether they're dominant or recessive and various other factors, but tomatoes are easier than most because they can be inbred without any ill effects. So breeding a new variety could be as simple as finding something you like in the F2 generation and allowing it to self-pollinate. In other cases you may get some variation in the offspring and have to 'rogue out' any off-types for a few more generations to stabilise your new variety.

If you choose one or more F1 hybrid varieties as parents for your hand-pollination you will end up with all sorts of unpredictable weirdness. That doesn't mean you shouldn't do it, but you should be aware that it's the genetic equivalent of chucking everything into a big melting pot. F1 hybrids are not true-breeding and the seeds you get from your pollination will have all sorts of segregations of different genes combining with more different genes from the other parent. You could end up with pretty much anything!

(With thanks to my friend Caroline for helping me with the photographs.)

Monday, 21 August 2006

Today in the garden ...

Swift F1 sweetcorn set against a background of laundry to symbolise the garden's status as a place of work and domesticity (oh all right, I didn't realise they were in the shot).

I planted out 47 leeks that my next door neighbour gave me. I already planted out 20 of them about a month ago and I still have about 9 left in the pot. That's right, all 76 of them were originally growing together in one pot. My neighbour got them from the old geezer across the road in exchange for lawn mowing favours, and passed them on to me because he says he and the wife don't really eat these oniony type things. He gave me half a marrow last week from the same source, because he said (gesturing towards the kitchen) "I can't see 'er cookin' it." I don't like marrows, but I know better than to turn down anything that came from the old geezer across the road. The old geezer's garden is the stuff of legend. I've never seen it, but from my bedroom window I can see the monstrous wigwams of pink and red flowered runner beans poking up over the back of his garage. I don't know how he does it; he's in his eighties, almost blind, and ambles along very slowly with a stick. But he does all his own gardening, and his front garden is full of immaculate tubs of bedding plants which look like they're straight off a stand at a flower show. And my next door neighbour has told me all about the back garden, which he says is "all laid out like allotments". Every year the old geezer puts four marrow seeds on the top of his compost heap, and the plants trail down the garden to a distance of 25-30ft.

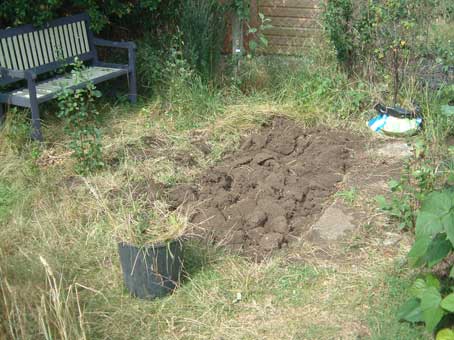
New veg plot emerging from crappy lawn. It doesn't look great at the moment, but it's a start.

Only trouble is, I have no spare growing space. To accommodate the leeks, plus a few other homeless bits and bobs like winter cauliflower and a couple of chitted potatoes I've had on the windowsill for ages, I have been digging another new veg plot from a scrubby and largely redundant patch of lawn near the bottom of the garden. When I took over the garden in 2004 almost the whole lot was laid to lawn, and as I'm working single-handedly on restoring it to full cultivation it has to be done in small chunks as and when I have the energy.

Red sweet peas

Guess what I went and bloody did? I went out to collect some of these nice red sweet peas to bring into the house and I managed to cut one of the stems I'd hand-pollinated in an experimental cross with an old-fashioned Cupani sweet pea. Duh! I only realised it when I saw one of my little purple marker tags among the flowers in the vase. What an eejit! It was a successful pollination too, full of lovely tiny seeds. So I had to go out and do some new pollinations today with what's left of the Cupani pollen.

I don't often post photos of prurient produce on my blog (I'm sure there are plenty of other websites specialising in it) but this double damson was too good to miss. I haven't been able to identify this damson variety yet, which comes from a pre-1930s tree and tastes like a plum. I reckon it's an obscure old Gloucestershire variety called Arrrse!

Saturday, 19 August 2006

Today in the garden ... Dodgem RIP

California poppy and wild chamomile growing in the potato patch

Well, I did say Dodgem looked like he was nearing the end of his rummaging. I found him under the Tewkesbury Baron apple tree this afternoon, and he seems to have died of natural causes. We buried him in a tumulus under the tree.

There are plenty more animals in the garden though. Including this big woolly one who does plenty of rummaging of her own. This is Chiana, our Norwegian Forest cat. She's very camera shy so I never get to photograph her face.


So far I've only tried Mrs Fortune's climbing bean in the form of green beans, i.e. cooking and eating the whole pods, and they're very succulent but I haven't found the flavour to be outstanding. Today I found that this variety really comes into its own when you leave the pods to swell a bit and then shell them out and cook the beans fresh. Shelling them is a bit laborious because the pods are still very fleshy and succulent at this stage, but it's worth it. I also found it hard to find any cooking instructions, because fresh shelled French beans are something you almost never get in the UK ... I guess it doesn't make an economical commercial crop so you don't find it in the shops. Darned shame too, because if these are anything to go by we're really missing out. Boiling the beans in unsalted water (salt hardens the skins) for 5 or 10 minutes seems to do the trick. Mrs Fortune's beans are greenish white and rounded like a haricot. Texture and flavour are wonderful. When fully mature they develop beautiful maroon splodges on the seed coat, but I think for eating they're best before they reach that stage.

Mrs Fortune's climbing bean has a lovely texture and flavour when cooked without its pods. Notice the variation in the blue streaks on the pods because the blue only develops with exposure to sunlight. The pod at top left is reaching full maturity and is turning maroon and cream. I'm keeping that one for seed.

I also tried some shelled out Kew Blue beans cooked the same way, and they were possibly even more gorgeous ... the beans are slightly kidney shaped and start off white but turn a greyish blue after cooking, and they have a firmer and nuttier texture and flavour than Mrs F. But where Mrs Fortune's really has the advantage is in its mad yields, which far exceed Kew Blue's, so shelling is the obvious thing to do with it since you'd have a heck of a job getting through it all if you ate them as green beans. A preposterously abundant crop.

It's still raining on and off, and I'm starting to fear some of the tomatoes will not get a chance to ripen unless we get an improvement in the weather. It's not the rain that's a problem, it's the grey skies. Tomatoes need a certain level of light in order to photosynthesise; if the sky is overcast for any length of time they just don't grow. I had to move a couple of my American tomatoes because the bed I'd planted them in no longer gets enough sun now that the season is turning and it's getting lower in the sky, and they basically refused to grow any further. Unfortunately I'm completely out of growing space, sunny or otherwise, so I had to create a new bed for them out of the corner of the lawn, give it a frenzied digging over and enrich it with horse manure. It looks ridiculous, sliced out of an otherwise square lawn, but the plants are happy now.

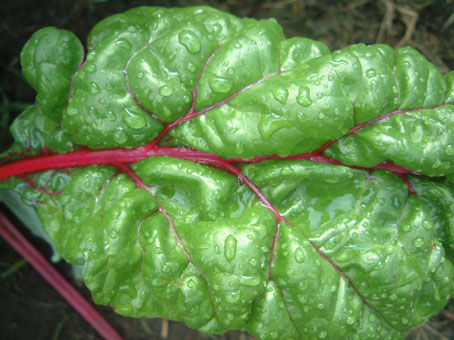
One crop doing especially well this year is rainbow chard Bright Lights; last year the leaves were mangled by an assortment of slugs and caterpillars but this year they're pristine. I'm hoping this is a sign that the ecosystem is finding a balance now. The garden was managed with chemicals up until the time I got it (2004) so it's still in the process of adapting to organic.

Thursday, 17 August 2006

Today in the garden ... wet fruit

This is one of the reasons I fell in love with this garden the moment I set eyes on it

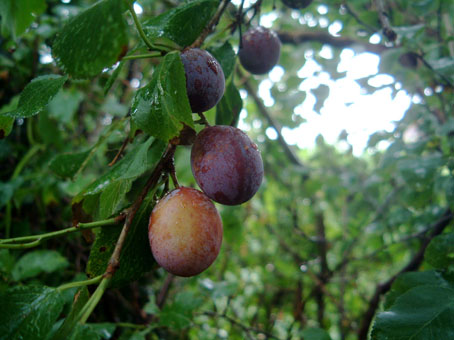
Up until the 1920s and 30s, the west side of Cheltenham was covered with orchards and lots of different fruit trees. As the town expanded almost all of it disappeared. Our house was built in the mid 1930s on land which had been growing damson trees (damsons are like small plums) and although most were lost a few of the original trees still survive along garden boundaries. I'm especially lucky to have two in my garden (although one is growing on the corner point of three gardens so it's hard to say who actually owns it). One has fairly large black fruits with a grey bloom and is slightly on the bitter and tastless side, to be honest. The other one (shown in the photo) has smaller, golden-reddy-purple fruits which taste exquisite. So exquisite I even crawled through a big heap of stinking soggy twigs to get at them and ended up with a spider in my hair. Ewww.

It's been a really good year for tree fruit. They don't seem bothered by drought, but then Cheltenham is a spa town and there's underground water pretty much everywhere in this area, so they've probably got their roots into the nearest aquifer. The damsons have been very abundant. I also have an old and decrepit pear tree which is fruiting like billio. I don't actually like pears as it happens, but I can certainly find willing recipients to palm them off onto. And the apple trees I planted earlier this year are looking fine and dandy.

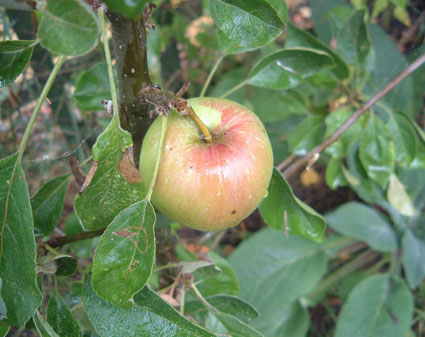
A Tewkesbury Baron apple, a local heritage variety I planted just a few months ago

I haven't seen Dodgem out on the prowl for the last couple of days so hopefully he's gone back to his regular nocturnal routine. It certainly looks like it, because I had a pot of holy basil ransacked overnight and its contents spread across the patio and in the cats' water bowl. But one thing I have discovered is where he hangs out during non-rummaging times. And I found it because I heard him snoring while I was tending some tomato plants at the bottom of the garden. When Shakespeare wrote his famous three witches scene and came up with the line "Thrice and once the hedge-pig whin'd" he was using some artistic licence, because the noise they make is more of a wheezy snuffly slurp. But then I guess "wheezy snuffly slurp" would have been harder to fit into an iambic tetrameter. Not to put too fine a point on it, hedgehogs sound like somebody with a very bad cold. And following the noise to its source, I found a narrow hedgehog-sized gap between the chainlink fence and a large log which forms the boundary of my bog-garden, and there was Dodgem curled up asleep with a few flies buzzing round him.

Things I've learned today: if you're cleaning out a vase with a long and very narrow neck it's NOT a good idea to turn the tap on full blast.

It's been perfect weather for the garden today because it chucked it down with rain all morning and then the sun came out. No matter how much effort you put into irrigation the garden always responds best to real rain. And now the sun will help the plants make the most of it. Rain followed by sun makes everything smell wonderful, and the water and light create some beautiful photo opportunities.

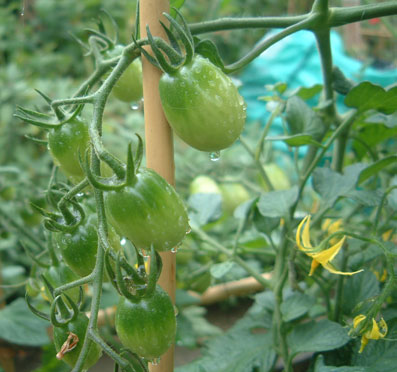
I don't have any red tomatoes yet, but the green ones give me plenty to look at. This is Pink Jester ...

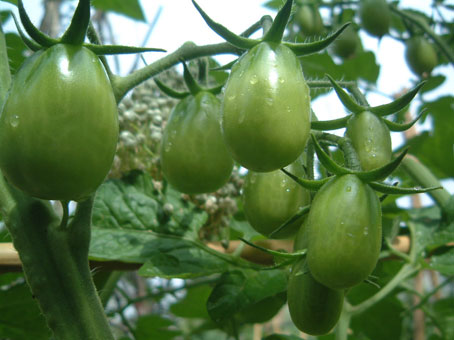
... and this is the Russian heirloom Black Plum

Monday, 14 August 2006

Today in the garden ... the rummager unmasked!

Evidence of rummaging

I went out for my morning inspection of the garden and discovered that my Alderman pea seedlings (above) had been rummaged overnight, as had my newly planted potatoes and a few leeks. The mulch of grass cuttings I put around my tomato plants a few days ago had been burrowed into and flung all over the path. Grrrr!

But this time there was forensic evidence! There in the soil around the pea seedlings were some claw marks, and in one place something resembling a footprint. It wasn't very clear, but enough to see that the phantom marauder has small clawed hands with a spread of about half an inch. Which immediately led me to conclude it was a hedgehog. It's the most common nocturnal digger in the UK with feet of that size, and it eats worms and grubs. It still doesn't explain how or why it got to the pots I'd put in high places, but it was by far the most likely.

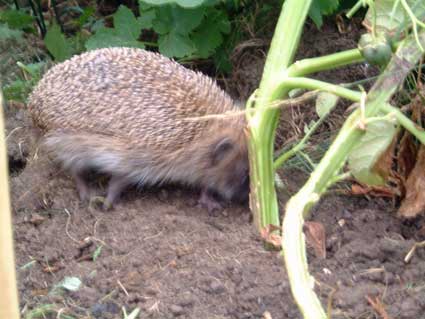
And then I turned round and saw the culprit himself! A hedgehog waddling across the scrubby patch of lawn I laughingly call a wildflower meadow at the bottom of the garden. "That's odd," I thought. "They don't normally come out in the daytime." I had the camera in my hand so I managed to snap the evidence before he sauntered off into a pile of discarded potato haulms.

Rumbled!

And another thing that was odd ... he showed no fear of me at all, and not even much awareness that I was there. Most hedgehogs leg it into the bushes when they encounter a human. Then I got a closer look at him and saw that he was blind. In fact he looks like a very elderly and decrepit hedgehog indeed and I fear his rummaging days are drawing towards their natural close. I stood very still for a bit so as not to startle him and he came right up to me, brushed against my legs and then walked over my foot!

One of my cats came out to see what was going on but she obviously knows that prodding hedgehogs is not a good idea so she just sat and looked at him. At first I thought he was on his last legs because he spent some time slumped under a butternut squash plant making wheezing noises, but then he got up and started scampering about ... found his way into next door's garden and then came back in the late afternoon and scampered around on the patio, trampling my chocolate cosmos in the process.

I'm calling him Dodgem because he charges around bouncing off things. He seems happy enough; he can't see where he's going so he just crashes through stuff.

Out on a 24-hour rummaging spree. And I hoped you wouldn't get to see those horrible slug-tunnelled spuds. Dang.