Showing posts with label Seed saving. Show all posts

Thursday, 30 April 2026

Cheltenham Green Top – can I rescue this?

Here's one I prepared earlier: a flower spike from the last time I did a seed run with Cheltenham Green Top, in 2006.

High on the list of seeds I wanted to buy this year was my favourite beetroot, Cheltenham Green Top. It feels personally important to me because I live in Cheltenham, and this heritage variety, known to be well over 100 years old, most likely originated in my local area. The soil in much of Cheltenham is light and sandy, offering a great environment for its long, deep-growing, tapered roots, which are shaped more like a blocky carrot than the familiar globular beetroot of the modern day.

I wasn't expecting to have any trouble getting hold of Cheltenham Green Top, because it's been widely available for a long time, and has had a bit of a renaissance too in the last few years with a number of high profile gardening people singing its praises. So it was a bit of a shock to find that its availability on the UK market (at least for the moment) is basically zero.

A few seed companies list it, but all are out of stock. Most don't list it. I drew a blank on big mainstream seed merchants and all the small independent ones I could find. The only places it was available and in stock were a couple of sellers in continental Europe, but thanks to Brexit (no, honestly, don't get me started) it's no longer possible to buy seeds from companies in the EU, nor for our friends in Europe to buy seeds from the UK. I find this desperately sad and it has had a big impact on what is available for us home gardeners to buy. (Especially with potatoes, where the heritage spud market is all but destroyed by trade barriers, but don't get me started on that either.)

I don't know whether the absence of my special beetroot is temporary or permanent. But I do know that this is how vegetable varieties disappear. We take for granted that they're always available until suddenly they're not. Seeds get discontinued without fanfare, or the big companies don't bother maintaining them properly so they lose vigour and reliability until nobody wants to buy them any more. Heritage varieties are almost always open-pollinated, but the big seed merchants make much, much more profit from selling F1 hybrids, so they often don't really care very much if the older varieties fall by the wayside. But once they're gone, their unique characteristics and irreplaceable genes are also lost, to the detriment not only of home gardeners like us but potentially for the future food security of humanity.

What if Cheltenham Green Top beetroot has gone? This may well be a temporary shortage and it will come back in the next year or two, but what if it doesn't? I have been worrying about this quite a lot.

Then a ray of hope. In a half-forgotten cardboard envelope in the corner of my office, I found this.

A new/old UNOPENED packet of Cheltenham Green Top seeds from the late lamented Chase Organics, the company who ran the Organic Gardening Catalogue. These seeds would have been among the last packs produced by Chase and they date from 2016, with a sow-by date of 2018! Eight years out of date. I bought them almost a decade ago and didn't get round to sowing them.

They were still sealed. This boosted my hope that they might still be viable. If it had been a long-ago-ripped-open packet of this vintage then I wouldn't have had much expectation of them germinating. Though I would still have sowed them anyway. You never know until you try, do you?

If I can get these seeds to germinate then I can do a seed run from the resulting plants. 

Saving beetroot seed is not the most straightforward process as it takes 2 years. You have to grow the plants to maturity the first year, store them through the winter, then re-plant them the following year, at which point they turn into tall gnarly monsters and produce stupendous amounts of seed. You don't get to eat much of the crop, which is a bummer. There are additional complications, such as avoiding cross-pollination and ensuring you have enough plants to maintain a diverse genepool. 16 is around the minimum you need, and they have to be good quality, true-to-type specimens.

Chase were an excellent and venerable company founded by a true pioneer of organic horticulture, but sadly they were gobbled up by Suttons in 2018 and the Organic Gardening Catalogue became a bolt-on of Dobies' catalogue. I don't know what its long term future will look like. I've bought some good seeds from Dobies but others have been unmitigated shite, so they're not among my preferred suppliers. Finding an old pack of Chase seeds, which will have been produced to a high standard, is quite a blessing.

But will they grow? We all know that 'sow by' dates are pretty meaningless, and have more to do with regulatory compliance than with the actual life expectancy of the seed. But the other date is suspect too. 'Packeted year ending October 2016' doesn't necessarily mean they were produced in 2016. They might just as easily have been harvested the year before, or even earlier. So at this point they are at least 10 years old.

I've said it before, but ... old seeds are always worth a try. I would use fresh seed given the choice, but when you only have old ones available they have to be worth a pop. Worst case scenario is that you have to recycle the compost.

I opened the pack and sowed a few in some modules. This is the sight that greeted me today. Yesterday there was nothing. And today, here they all are.


I will have to sow quite a few more of these now, to ensure that I have a good selection and can find at least 16 good ones, plus some extras in case of losses. Fortunately there is a generous amount of seed in the packet. I will also have to be prepared to give over a chunk of the garden to them next year to make way for their blazing triffid flowers.

There's still a long way to go before I can be confident of getting seeds from these tiny plants, but it's a good start, isn't it?

Thursday, 27 June 2019

A trial of ludicrously ancient tomato seeds


This year I decided I wanted to grow some more of a tiny globular red tomato called Tomatito de Jalapa which was given to me years ago by my friend Patrick Wiebe. This is a blight-resistant variety, at least to some extent, which grows quite well outdoors in the UK, and I also love the taste of it, and the tiny, almost perfectly spherical tomatoes. It's not a normal garden tomato, it's a species of wild tomato from South America which is not (to my knowledge) commercially available. Therefore it's quite rare, and you can't buy its seeds in the shops.

When I grew it in the past, I saved seeds from it. Of course I did. But I'm buggered if I know what I've done with them. Somewhere there must be a box of home-saved tomato seeds hiding in a corner of my incredibly well organised house, because there are other varieties I'm missing which I know I've saved seed from. Anyway, when I was sowing my tomato seeds this year, I couldn't find them. I did, however, still have the little baggie of seeds which Patrick originally gave me, and which he'd sensibly labelled with the year they were produced: 2009. So these are 10-year-old seeds. The received wisdom in many gardening books is that old seeds won't germinate, or will produce only feeble plants, but I know this to be bollocks. So I put a bit of compost in a tiny flowerpot and sowed one of Patrick's decade-old seeds just to see whether it would grow. As you can see in the photo above, it did.

I dug out a couple of other geriatric seed packets from my box which I wanted to resurrect. One was an unidentified variety which I call Café Rubik, because I filched the original single cherry tomato from a café in Cheltenham called Café Rubik, in April 2010, after having it arrive on my lunch plate and deciding it was probably the best tomato I'd ever tasted. It must have been an F1 hybrid, whatever it was, because it segregated into three different fruit colours the first time I grew it. That doesn't put me off, of course ... I love to see a bit of segregation so that I have the option to select something new and unique. So Café Rubik the F2 still lives, the seed from that single original tomato (plucked from a salad, no less) still germinating after nine years, long after the café itself has closed down.


Another one I decided to grow out was this ancient packet which I got as a freebie from the Heritage Seed Library. Salt Spring Sunrise, a Canadian heritage variety. God knows how old these seeds are; they're not dated, and I don't remember what year I was sent them. It could easily have been as long ago as 2007. And while the others I sowed had at least been stored in airtight grip-seal bags, these were just in a plain brown paper envelope, stashed in a cardboard box in the spare room. Anyway, I sowed two of these seeds, and one germinated. Initially it did struggle to free itself from its seed husk, and when it finally emerged from the soil it had ripped both its cotyledons clean off! It was left with a pair of green stumps. I didn't think there was much hope of it surviving, but after sitting there fattening up the green stumps for a couple of days, it began to grow its true leaves – and very quickly recovered.


Inspired by the longevity and resilience of these seeds, I thought it might be interesting to do a more formal germination test on some of my other tomato seeds, to find out just how old or craply handled they have to be before they stop germinating. As I never throw anything away, I had no shortage of ludicrously outdated specimens to choose from. I selected six packets of varying ages, which included some purchased seed and some I'd saved myself. Here they are:


Some of the bought seeds were from Association Kokopelli and some were from Terre de Semences, which is what Association Kokopelli was called before it became Association Kokopelli. I haven't purposely singled out this supplier, I just chose them because they're the oldest seeds I have in my collection. The ripest vintage was a pack of Boondocks produced in 1998, which makes them 21 years old at the time of sowing. Close on its heels came the millennium-era seeds of Canabec Rose; a 16-year-old pack of Peacevine Cherry from 2003, and some Anna Russian from 2007. Bringing up the rear were two packs of my own seeds: an F3 derivative of a variety called Pink Jester which I originally bought from a supermarket and saved seeds from, and the special beta-carotene rich orange variety Caro Rich, which I hadn't even saved properly – they were just scraped out of the fruit onto a piece of kitchen roll and left to dry. These seeds are 13 and 11 years old respectively.


The test was not all that scientific. I filled a small 6-module tray with compost, and on 3rd May I sowed two seeds of each variety in the front row (the younger ones), and four each of the varieties in the back row, since the older ones were less likely to germinate. These are very small sample sizes, but I didn't want to sow too many just in case they all grew! I'm emotionally incapable of murdering seedlings which are surplus to requirements, so if I'd ended up with a dozen plants I'd have had to find room for them all somehow in the garden.

The tray of seeds was kept on the windowsill in my music studio, which has a radiator under it, and this was on fairly often as the weather was so bloody cold. This bottom-heated windowsill is brilliant for germinating tomato seeds and it didn't take too long for the first germination.

And the first one up after 10 days was ... Caro Rich!


Then came Pink Jester F3, a couple of days later. Both the seeds of that one germinated, while with Caro Rich it was just one. At 11 years old, Caro Rich was the freshest of all the varieties I sowed, but it was very interesting to me to see it germinating so readily, given that the seeds had been saved in the crudest way. The proper way to save tomato seed is by the fermentation method, which is what I would normally do and recommend, and the simple method of lobbing them onto kitchen roll and letting them dessicate into a disgusting scabby crust is widely frowned upon as a bad way to save tomato seeds. For one thing they stick irretrievably to the kitchen roll, so when you want to sow them you have to tear around them and sow them with some of the kitchen roll still attached. There's also the matter of the germination-inhibitor chemical which tomatoes naturally produce within their gel, which stops the seed from germinating while the gel is there. The fermentation method removes this very effectively; the kitchen roll method doesn't. Though you could argue that at 11 years old, any biochemical inhibitors had probably degraded anyway. I also stored the kitchen roll sheet in a sealed plastic bag after it was fully dried, so that might have helped to preserve it. But still, it was interesting to see this seed germinating normally in spite of everything.

I'd still recommend the fermentation method for most tomato seed-saving, but if you really can't face doing it, or haven't got time, or it's a tiny quantity of seed which is too fiddly to ferment – you should be fine just to splat it onto a paper towel, and still expect to get a decade's worth of viability out of it.

Following these initial germinations I didn't get any more. I kept the trial going for around a month, but nothing else showed up. I took the tray out to the greenhouse and potted up Caro Rich and the two Pink Jester seedlings, all three of which are growing on well. I don't generally find that plants from old seeds are inferior to plants from fresh seeds (though I'm sure some commercial seed companies would like people to think that). They may be slightly slower to germinate and have less available nutrient within the seed to get them through the germination process, but once they've established themselves with a root and a shoot they usually grow pretty normally. The really old seeds in my trial didn't germinate though. Maybe some of them would if I sowed a larger sample. But for now, I forgot about the rest of the modules as I got into my busy season, and they stayed on the top shelf in the greenhouse. Until, seven weeks after I sowed the seeds, I found this:


Yes, it took its time all right, but Anna Russian germinated, at 12 years old. This is a phenomenon that most tomato growers have probably come across, even with much fresher seeds than these: a tray which fails to germinate is cast aside, only to be found sprouting quite happily several weeks later after being completely abandoned and neglected. Sometimes tomatoes just inexplicably won't sprout until they're ready, and they won't be rushed.

Sadly, the day after this photo was taken, Anna was razed off at soil level by a snail. So I won't be growing any of that variety this year. But still – it germinated.

One important observation I made with all of these antique seeds, and not just Salt Spring Sunrise which had the most extreme case of it, is that they were all very prone to getting the seed husks stuck on their heads when they first emerged from the soil. This is not surprising, as the older the seed is, the more it dries out and shrinks. It might be a good idea to try to reconstitute the seed with a bit of moisture before sowing it, to help avoid the problem of seedlings getting completely stuck and unable to release themselves, but I haven't done any experimenting to find out how best to do that. Maybe an overnight pre-soak would be enough.

The message of all this, in summary: don't immediately assume that a packet of old seeds is no longer viable – at least give it a go.

Sunday, 28 September 2008

Goddess tomatoes and seasonal joys

A plethora of newly harvested heritage beans

With all the crises I've been dealing with over the summer, the garden has been badly neglected this year. To the point where I'd be embarrassed to let anyone see it, even a non-gardener. I've managed to look after the crops OK, but I didn't keep on top of the weeds earlier in the season and they've got themselves well entrenched. And I had to steel myself to go out there and start dealing with them today, because I'm making a change to my gardening method this year.

Normally I allow the garden to biodegrade gracefully in its own time over the winter. It's partly laziness and partly hippy idealism. My reasoning is that by leaving a tangle of last year's decaying crops on the land over winter I'm providing shelter for overwintering insects, seeds for birds to eat, and ground cover to protect the soil, and by January it's all nicely broken down and easy to dig in ... a nice bit of organic matter to enrich the soil. But in the last couple of years it hasn't worked out so well because it also provides the perfect overwintering conditions for slugs and snails, whose numbers have erupted out of control over the course of two wet summers. So I'm afraid this year I'm clearing it all and the wildlife will have to find somewhere else to shelter. I'm hoping the birds and frogs will quickly gobble up the snails, or else they'll bugger off into next door's garden (where he doesn't actually grow anything so they won't bother him).

But I do have quite a task on my hands. It's a case of: Hmmm, I'm sure there are some gooseberry bushes somewhere over here under these swathes of long grass. I'll just carefully insert a gloved hand and OOOOOOOWWWWWW FUUUUUUUUUCK! Oh yes, there's one.

One thing that will directly benefit the wildlife (birds, mice and slow worms anyway) is the continued incapacitation of the Ginger Peril. We had another crisis recently when his bandage slipped and reopened his operation wound, which had to be stitched up again. And of course it had to happen on a Sunday, requiring a trip to the emergency out-of-hours vet, who charged £113 for a temporary bandage to last him until the morning. It also meant an extra two weeks in the cage, bringing his confinement time to 6 weeks. But he does look cute in his little plastic bonnet.


Most of the harvest is safely gathered in now. The last of the bean crops are now drying indoors, as seen below. The dark curvy ones on the left (and shelled out in the bowl) are Major Cook's Bean, which I'm growing for the Heritage Seed Library as part of their Seed Guardians scheme, and which has been so spectacularly prolific it's going to cost a small fortune to post it back to them. Look out for it in next year's catalogue, it's a corker. I've posted a full review of it here. In the middle are the dried out pods of the similarly abundant Poletschka (thanks Celia) and to the right some green-yellow San Antonio from the Heritage Seed Library, which also did well for me.


The area you see here spread with beans is the bed in the spare room. Needless to say we don't have many guests to stay at this time of year.

You will notice that I harvest bean pods for seed-saving as soon as they're mature, and dry them indoors rather than leaving them outside to dry on the plants, as is often recommended. The reason for that is the unpredictable weather, which can ruin an otherwise excellent crop if the rains decide to come down heavy in September. This year they haven't, and September has turned out to be better than August, but I wasn't taking any chances. It does no harm to harvest them at this earlier stage, as the plants have already given them as much nourishment as they're going to get. It is important though to keep them well ventilated, ideally by spreading them out so they aren't touching, and turning them regularly. If you don't, they can easily go mouldy.

And no harvest would be complete without a parade of weirdness. And so I proudly present my Threefold Goddess Tomato. She's taken her time to ripen, but here she is.

The bottle-top is for scale (gave me an excuse to crack open a beer anyway)


She is the Divine Feminine expressed in fruit. She is essentially three tomatoes fused together in harmonious symmetry, born out of one flower with an unusually wide stigma, and endowed with various crevices and hollows which look a bit ... erm ...

Anyway, she was the first fruit produced by an exotic variety called Orange Strawberry which I grew in my greenhouse. It's an oxheart type, which means it's large, heart-shaped (normally it is, honest) and exceptionally fleshy inside with very few seeds. It's really a cooking tomato, and has a wonderful flavour when cooked as well as this glorious bright orange colour. See here for a full review. Not one you'll find in garden centres ... I got my seeds from Association Kokopelli.

Monday, 22 September 2008

Saving seed from tomatoes

Tomato seeds for future generations, in pulps of all colours. Banana Legs (left), Black Prince (top), Douce de Picardie (right), and Caro Rich (bottom).

Bugger the credit crunch ... you need never pay for a packet of tomato seeds again if you adopt the age-old practice of saving your own. Even a single fruit will yield enough seeds to last you for years (or to share with your friends) and they can quite easily stay viable for 10 years or more, so it's really well worth doing. As tomatoes are naturally inbreeding and self-pollinating, you can get away with growing a small number of plants and saving just a small number of fruits. If you save seed from F1 hybrid varieties they won't come true to type, but the results can be interesting in their own right. Many commercial F1 hybrids are a rip-off anyway, unless you want to use them to develop your own versions.

There are basically two ways of saving seed from tomatoes. The recommended way is to ferment them in their own gel, which works very well but is a little fiddly and icky. And then there's the quick bodge-job method, which is often frowned upon but works perfectly well in my experience. Personally I use both ... the proper method for larger amounts (saving seed from two fruits or more) especially if I intend to give them away to others, and the bodge-up method for small amounts (one to two fruits).

Either way, the ideal thing is to use tomatoes that are over-ripe ... past the point where you'd want to eat them. I often compromise by using only slightly over-ripe fruits, cutting off any bits which have gone manky and stewing up the remainder in a pan with olive oil to make a lovely sauce. That way nothing gets wasted. You CAN save seed from tomatoes which are still green, but the less mature they are the more risk there is that the seeds are immature, in which case they may not germinate.

If possible, avoid saving seed from plants suffering from blight. I say "if possible" because frankly the blight problems have become so bad in the UK it's almost impossible to grow a totally blight-free crop these days. If you have a plant you really want to save seed from and it has blight, save seed as early in the season as you can (even if the fruits are not fully ripe) and choose the least affected fruits.

Even with the more elaborate method, saving tomato seeds is very easy. Just try not to use the unladylike language I did this morning when I dropped a load of partially dried Caro Rich seeds all over the carpet (it had to be a beige carpet, didn't it?)

The fermentation (recommended) method
Slice open your chosen fruit(s) and spoon out the seeds, complete with their surrounding gel, into a small jar or container. Clear glass is ideal so that you can see what's going on in there during fermentation, but any container will do ... a jam-jar or a plastic yoghurt tub. The little glass dishes you get with overpriced puddings from Waitrose are ideal. Whatever you use, it needs to be narrow enough to create a bit of depth when you put the seeds and gel into it. Most people add a small amount of water. It doesn't make a lot of difference either way, but a bit of water seems to help things along. Use a separate dish for each variety you're saving seed from (that should be obvious but I'd better say it anyway).


Cover the jar with a scrap of foil and leave it somewhere like a windowsill for about two to four days.

After a day or two you should notice some changes happening in the jar. Bubbles, for one thing. They may not be active fizzy bubbles, but there should at least be some bubbles hanging around in there. The other thing you'll get is a hideous crust of mould over the surface. This is entirely normal and should be left undisturbed.

I'm fascinated by the diversity of mould that appears on tomato pulp. Sometimes it's a pale waxy yeast-like gunge over the surface, and sometimes it's more bluey patches, or little white hairs. Occasionally you get the whole jar filled up with soft dry fluffy stuff like grey candy floss, which flexes to the touch like a delicate sponge.

Ewwwwww!

After a few days you can tip the yukky stuff out and retrieve your seeds. It's difficult to give a time scale for when to do it, it's not a precise science. Allow the mould to grow right over the surface, and it should be ready shortly after that. The main thing is not to leave the seeds fermenting too long, or they will start to germinate and be ruined. Fermentation happens much faster in warm conditions, and can be ready in as little as 24-48 hours in a hot climate. More usually though (in European countries) 3, 4 or 5 days is about right.

When you're ready to decant the slop, the first step is to gently peel back the mould layer with a teaspoon. Sometimes it just peels back as easy as anything like custard skin, other times it's more irksome. Either way, there will probably be some seeds sticking to the underside of it. You have two options at this point. You can go "uuuuuuuuurrrrrrgh!" and lob the whole lot straight in the bin. Or you can carefully hold the mould disc aloft and scrape the seeds off with a teaspoon. It all depends on how precious the seeds are and how squeamish you are about mould.


Once it's denuded of its mould layer, slop out the contents into a fine-meshed sieve or a tea-strainer, and gently wash it under a slow-running tap. It can take a bit of rubbing to get rid of all the fleshy pulp, but eventually you should be left with a strainer full of nice clean wet seeds. I usually leave them to dry in the tea-strainer, but you can dump them out on a plate. It's not a good idea to put them onto kitchen roll or paper because they may stick to it, though it's OK to put the strainer down on top of some kitchen roll. Either way, the seeds will clump together as they dry and it's a good idea to give them an occasional rub to separate them.


Within a few days you'll be left with the familiar cute fluffy little seeds ready for packeting up.

If you're saving more than one variety, take care not to muddle them up. Most are impossible to tell apart. Make sure there aren't any seeds from a previous batch clinging to the sieve or teaspoon.

Why go to all this bother, you may ask? Well, the gel around the tomato seeds contains a chemical to inhibit germination (very useful to prevent the seeds germinating within the fruit as it ripens). The fermentation method mimics nature's processing of the seed by breaking down the chemicals in the gel, making use of the naturally occurring Oospora lactis which is responsible for the rapid rotting of fruit, and enabling the seeds to germinate freely. In the process it rids the seeds of many bacterial diseases.

The Quickie Bodge-Up Method
Just scrape the seeds out of the tomato straight onto a piece of kitchen roll (paper towels in the US). Spread them out as thinly as you can, and leave the sheet somewhere well ventilated for a few days to dry. Write the variety name on there, fold it up and store it in a seed envelope.

Here's one I prepared earlier

The seeds will be stuck glue-like to the sheet and may not ever want to come off, but that's OK, you can just tear round them at planting time and sow them with the paper still attached.

This has got to be one of the easiest seed saving methods around. It has two potential disadvantages. One, it doesn't kill off any bacterial diseases that may be lurking around the seeds, and two, it doesn't remove the chemical that inhibits germination. But in practice it isn't usually a problem. I've never had any germination problems with seed saved in this way, and they stay viable for years. Maybe the chemical does break down on the kitchen roll by the time you're ready to sow the seeds. The threat of seed-borne disease is small if you select fruits from healthy plants. So if this is really the only way you'd want to save tomato seeds, go for it I say.

Saturday, 22 March 2008

Take up thy seeds and sow


Association Kokopelli is in trouble. And it breaks my heart to see it. Their French website says "ON A PERDU!" in capital letters.

For those of you who don't know Kokopelli, they're a French-based seedsaver organisation who maintain 2500 varieties of rare and endangered vegetables and run several charitable initiatives in developing countries. Their work is vital and indefatiguable. Unfortunately it's also illegal, due to the preposterously backward seed laws in Europe, and this has now resulted in them being clobbered with a €35,000 fine. The gist of it is that Kokopelli were hounded through the courts by a commercial seed company, Baumaux (shame and damnation on them) because their catalogue of thousands of unique heirloom vegetables gave them an "unfair trading advantage". I won't subject you to the language that came spouting out of me when I read that but it's a truly insidious example of what happens when big business gets waaaaaay too much control of our garden seeds and our food chain. And it sounds a danger signal for the future of biodiversity in Europe.

Where else but Association Kokopelli can you get Venus' Nipple tomatoes? Seen here with Speckled Roman, Des Andes, Peacevine, Caro Rich and others.

Now, a few weeks ago I was honoured with this "E for Excellent" award by Jeremy from Agricultural Biodiversity and was too busy to do anything about it at the time. It's just an informal fun thing but I'm very appreciative of the endorsement, not least because Jeremy is the author of a much respected seed saving book and a long-time champion of heritage vegetables, so I consider it a great compliment that he reads my blog at all, let alone considers it worthy of mention. The deal is that I'm supposed to nominate 10 other blogs for Excellence, but as this one has already been doing the rounds for a bit, a great many of my favourite blogs have already been awarded it. So here's what I'm going to do instead. I'm presenting my "E for Excellent" award to one of my greatest gardening heroes. And the hero of the moment for me is Association Kokopelli's Dominique Guillet.

Back in the 1980s, Dominique Guillet was an entrepreneur making products for the Bach Flower Remedy company. What frustrated him though was that there wasn't much point in people taking remedies when the food they were eating was rubbish. So he sold up and spent the money on a plot of land in the Auvergne, where he set about growing organic vegetables and collecting rare and unusual heirloom varieties from all over the planet. Some came from botanical gardens, some from organic growers, and many from individuals who had created and maintained their own varieties. He set up a non-profit organisation called Terre de Semences to produce and sell a huge range of these seeds, enthusiastically taken up by garden centres all over France.

Disaster struck in 1997 in the form of the French Ministry of Agriculture, who started getting heavy-handed over Terre de Semences' distribution of "illegal" seeds. They were faced with an obligation to pay a £45 registration fee for each of their 2000 varieties, or face enforced closure by the French fraud squad. Unavoidably, the organisation ceased trading.

Undeterred, Dominique bounced back with the foundation of Association Kokopelli. In addition to producing and selling organic heirloom seeds, the Association set up numerous charitable projects in countries across Asia, Africa and South America. These include educational foundations to teach local people to produce their own vegetables and also the large-scale distribution of free seed packets to the poor, including 50,000 packets given away in Afghanistan. All the seeds Kokopelli supply are open-pollinated (non-hybrid) varieties so that people can save their own seed from year to year and not be locked into a cycle of debt by big seed corporations.


Dominique's book The Seeds of Kokopelli is my joint-favourite gardening book ever (along with Carol Deppe's book on vegetable breeding). It's a very large chunky 440-page hardback book and contains a descriptive catalogue of 2500 vegetable varieties (the majority of which are available from Association Kokopelli if you want to try them) ... 600 tomatoes, 370 peppers, 200 squash, 130 lettuces, 40 melons, 50 aubergines and a whole load of things I'd never heard of. It has sections of colour plates with the kind of pictures I never tire of drooling over with childlike wonder. There's a historical and nutritional section for each type of veg, and cultivation instructions, including cross-pollination issues, seed saving methods and sometimes instructions for how to create new varieties. For tomatoes, for example, there's a detailed explanation of how different genes create different colour combinations. There is truly no other gardening book like it.

Not only is it one of the most inspiring vegetable gardening books ever written but its sale directly supports Association Kokopelli's charity work. In the UK it costs £24 including postage and comes with three free packets of tomato seed! (If you're in the US or Canada, you can get it here.)


I dunno what to do to help Association Kokopelli other than to support them by buying their seeds and encouraging all you heritage veg lovers out there to do the same. They need all the income they can get at the moment, and there's also the unmentionable possibility that these heirloom treasures may become unavailable if Kokopelli can't ride out this storm. They have a UK branch run by Chris Baur, an organic farmer in Kent, and a slightly scaled-down American presence. The online UK catalogue lists over 1000 varieties of wonderful stuff, much of which isn't available anywhere else, and if you buy more than five packets they send freebies. Sometimes the seed packets are in French but it's not difficult to work out what "fruits en forme de banane" are or that you need to plant out tomatoes "après les dernières gelées". Unlike most seed packets they tell you who grew the seed, and when.


The diversity of European seeds is under more threat now than it's ever been (with even more backward legislation on its way in for 2009) so it's never been more important for all of us as individuals to save and maintain non-mainstream varieties. Sow your heirloom seeds with pride and raise two fingers to the EU seed legislation and the big bloated corporations who feed off it.

I don't know what the future holds for Dominique Guillet and his team but he's an absolute inspiration to me and I wish him the very best of fortune and every ounce of strength to fight back.

Saturday, 23 June 2007

Saving peas for seed

This is one of my hand-made hybrids, Mr Bethell's Purple Podded x Alderman being grown for seed

I've now started harvesting some of the pods from my hand-pollinations, at least the ones that have had longest to mature. It takes about 5-7 weeks for peas to produce fully mature pods, depending on the variety, the weather, the growing conditions and how early in the season they were pollinated (the earliest flowers on the plants will usually produce the best seed, but may take longer to develop).

If you look at any seed saving guide, the received wisdom for peas is to leave them on the plant until they're fully dry, i.e. when the pods are brown and crisp and the peas inside are starting to rattle. And that's perfectly good advice if you're bulk-saving seed from a whole crop, especially if the weather is dry in the time leading up to harvest. But if you've put a lot of work into doing hand-pollinations then every pod matters, so I tend to harvest them individually as soon as they reach maturity.

Maturing pods of Kent Blue, which are unusually knobbly so you can see clearly how the baby peas are getting on

With tall peas it's very obvious when they have reached the end of their productive season. Their first step is to stop flowering, or produce only tiny unproductive buds. And then they flop. Big time. You should see my Golden Sweet crop now ... no sooner had I posted the picture of it standing six feet tall and full of bounty when it just collapsed, more or less overnight. It's now leaning over its bamboo frame in a great sagging heap. And damned heavy it is too, like a dead weight ... and one that makes a strange squeaking noise as the stems rub together. It doesn't look very glamorous but it's a perfectly natural event. Pea plants are short-season annuals and as soon as they've completed their production they naturally keel over and die.

In my experience, and this may be related to my garden's climate, the plants and the pods are vulnerable to a few problems at this stage. Once they've sagged, all the leaves and pods are pressed together and not very well ventilated, so if the weather is moist they can suffer with mould and mildew. Snails also like to crawl up and hide in the leafmass, where they seem to take a special liking to the mature pods even more than the young and tender ones, and chew great lumps out of them. These problems are obviously worse in damp weather, and if there's a lot of rain it's possible for the peas themselves to swell too quickly for their skins, and split open. It's also around this time of the season that the larvae of pea moths pupate and drop out into the soil to wreak havoc next year.

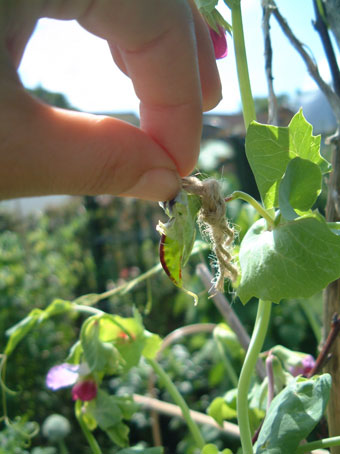
It takes a while for the pods to dry completely on the plant, but a while before that they go through a phase when the pod starts to change colour slightly or look a bit washed out and the surface goes leathery. The calyx (that's the little pixie hat at the top) dries up and withers, and the top of the pod starts to look a bit dehydrated and sunken where it joins on to the stem. (Picture on the right shows Carruthers' Purple Podded just approaching that stage.) I asked myself what message the plant is giving to the pods when this happens. I think the message is basically "right, that's yer lot!" The plant has been nourishing the pod all this while and now it's starting to withdraw its support. Any further nourishment and moisture the peas need have to be drawn from the pod itself, which is why the pod starts to look so leathery and drained. If the peas are no longer receiving moisture from the plant then there's no particular reason to leave them on the plant, as far as I can see.

So my rule of thumb is to harvest each pod when the calyx has withered, because the peas will have developed as much as they're ever going to, and may as well finish drying in a sheltered place.

Once harvested you can just leave the pods to dry out naturally, and shell them out when they've gone crispy. It normally takes three or four days at room temperature for the pods to dry down, and then they start to shrivel quite rapidly. (The peas themselves will take a while longer.) However, I do sometimes pop the pods open. Not to remove the peas ... I prefer to leave them attached to the inside of the pod until they detach themselves naturally ... but just to keep them well ventilated. I started doing this because I have had some go mouldy on the inside of the pod, which spoils the peas. The other reason is the dreaded pea moth. It's not at all unusual for these maggoty little blighters to pop their heads out of peas shortly after harvest. One of the signs of their presence is a brownish patch on the pea itself so it's a good idea to remove any peas which have brown patches. Once the grubs start to pupate they gnaw their way out of the pea, leaving a small round hole and a lot of brownish powdery debris. Do watch out for them because they are destructive little buggers and will often maraud their way through the whole pod.

Coloured threads tied around the flowers when I hand-pollinate them enable me to identify the different hybrids at harvest time.

If you're going to save the peas to plant next year, leave them until they are completely dry before bagging them up. The noise they make when (gently!) dropped against a hard surface is the easiest way to tell. They should land with a hard clack. Any hint of a dull thud is a sign of moisture.

However, if you're planning to plant them immediately you don't need to dry them out fully. You can plant them straight away, although I've personally had more success by drying them down at least partially before sowing them. I know it seems a bit pointless to waste time drying them out and then waste more time rehydrating them, but I assume some chemical change takes place because they seem much more willing to germinate from a dry or semi-dry state.

Why would you want to plant them straight away? It's sometimes possible to get two generations of a pea crop into a single British season. Unlike things like peppers and tomatoes, which need a complete seasonal cycle to do their stuff and are sensitive to changes in day length, peas complete their business within a short and fairly standard timeframe regardless of what time of year they're sown, as long as the weather doesn't mess them up. In the UK, a crop sown in late February or early March can produce seed by the end of June which can be sown straight away for a crop around September or early October. Some varieties do better at this than others, and there's always a risk of sudden bad weather causing problems ... so it's probably only worth doing if you're an impatient plant breeder like me, wanting to grow out the F1 generation as quickly as possible so I can get on to the far more interesting F2 generation.

Sunday, 20 May 2007

How to breed your own garden peas

Normally when a seed company is trying to develop a new variety they keep very quiet about how they're going about it, knowing that if they come up with something worthwhile everyone else will want to copy it.

There's no secrecy involved in the pea breeding project I'm doing for Ben and Kate at the Real Seed Catalogue. One thing I have in common with them is that we all believe passionately that genes, seeds and the skills involved in their production should be in the public domain. Unlike most seed companies they have extensive seed saving instructions on their website and I've been open about which varieties I'm crossing in trying to develop a new variety for them. So what's to stop anyone else copying what I've been doing? Absolutely nothing. And just to make sure you know how to, I'm going to explain hand-pollination.

The principles of making crosses by hand-pollination are fairly universal, and yet the details differ hugely from plant to plant. These instructions are suitable for all kinds of culinary pea, and will also work for sweet peas, and once you know what you're doing you can apply it to other plants. The basic principle is this: if you have a self-fertilising flower like a pea, and you want to cross it with something other than itself, you first have to remove its capability to self-fertilise.

So the first step is to emasculate the 'mother' flower by removing the little yellow blobs which produce pollen. That will leave you with just the female part, which is a long bendy green thing with a bristly bit down one side. With me so far?

Know your blobs from your bendy bits. The anatomy of a pea flower (with keel cut open)

Pea flowers have all their reproductive bits inside the keel, which is a sealed petal bag. The long green central bit is the style, but only the very tip is receptive to pollen. The pollen-bearing anther blobs gradually grow up towards the tip and shed pollen all over it. By removing the anthers before they get to that stage, you can intervene and fertilise the flower with the pollen of your choice.

The first step is to find a flower at the right stage. With peas that means using young buds, because their self-pollination happens very early on before the flower is anywhere near opening. The optimum stage is impossible to define precisely because it varies quite a lot in different weather conditions, and to a lesser extent between different varieties. The easiest time to do hand-pollinations is on a dry, cool, overcast day. On days like this the pollen is slow to shed (or dehisce, if you want the technical name) so you can get away with using larger buds which are easier to work with. When the weather is hot and sunny the pollen just goes nuts and splurges everywhere, so you have to resort to using only the youngest, tiniest buds. Windy weather is also a hindrance (try carrying a blob of pollen across a breezy garden on the tip of a scalpel blade and you'll see what I mean).

But as a general rule, choose buds where the petals are just about visible as they start to protrude from the sepals. The photo below shows a promising-looking bud.


Step 1: Peel open the bud ... gently roll back the sepals and the two outer layers of petals, and grasp them back out of the way. Inside you will find the keel petal, which is a sealed bag with a crinkly seam down the middle a bit like a cornish pasty. Using a scalpel or similar, carefully cut a slice in the keel. (You can remove part of it if necessary ... it won't do any harm.)

Step 2: As soon as you cut the keel open you will be able to see whether the bud has already self-pollinated or not. In an ideal bud, the anthers will be smooth dark yellow blobs with no traces of yellow powder on them, and will not yet have grown right up to the tip. Being careful not to damage the long green bendy bit in the middle, hoik out all the yellow blobs and pop them off with the scalpel blade. There are ten of them and it's best to remove them all.

If the anthers look fluffy or there is yellow powder inside the keel, it's probably too late. If in doubt, have a look at the tip of the green bendy bit. If it looks pristine it should be OK, but any trace of yellow stuff on it means that self-pollination has already happened.


Step 3: Mark the bud by tying a scrap of coloured thread around its stalk ... not too tight, to allow it room to grow a bit.

Step 4: Find a pollen source on another plant, of whichever variety you want to use as the 'father'. Again you may need to do a bit of poking about with a scalpel to find one with lots of pollen to spare, as it varies with the weather. The best ones are usually larger buds which are almost ready to open. Slice open the tip of the keel and scoop out as much as you can onto the blade. This will not harm the flower at all, because it will already have self-pollinated and started growing a pod ... all you're doing is making use of the surplus pollen. Fresh, fertile pea pollen is a deep rich yellow colour. If it's turned a pale sandy colour it's too old.

Step 5: Take the pollen to the 'mother' flower and gently slather it all over the tip of the green bendy bit. The receptive part is the stigma, which is the flattish area right at the tip. Please note, the stigma is NOT the bristly brushy bit just below the tip ... it may look like it should be, but it isn't.

It can be a bit fiddly to get the pollen in the right place but it gets easier with practice.


Step 6: If the remains of the keel petal are still intact, slip it back over the green bendy bit to give it some protection and help stop the stigma drying out. It's not essential though ... you can get away with just closing the outer petals back over it.

The flower should then open pretty much as normal over the next few days, and shortly afterwards you will get a pod. While the pods are small they are translucent against the light, so you should be able to see the baby peas inside if the pollination was successful. If it wasn't successful the flower will drop off.

In peas, it's quite usual for hand-pollination to have a lower success rate than natural self-pollination. So don't worry if your hand-pollinated pods only have two, three or four peas inside them. That's normal.

If you're looking to possibly produce a new variety, it's a good idea to hand-pollinate quite a few flowers ... at least 20. You don't need to do them all at the same time ... just do three or four a day for as long as the plants are producing good flowers. Allow the pods to develop fully and harvest them when they've started to go dry and crispy (in wet weather you may have to grab them earlier, to avoid problems with mould). Hang them up in a dry airy place to finish drying. You now have your own unique F1 hybrid peas. When you grow them they should produce plants with a mixture of characteristics from both parents.

Saturday, 20 January 2007

Heritage Seed Library time

It's that exciting (for me) time of year when I get to choose my six rare varieties from the Heritage Seed Library. Thanks to the ill-conceived legal restrictions on the sale of vegetable seeds in Europe the HSL is one of the few sources of rare heritage varieties in the UK, and they aren't allowed to sell them to you, so the scheme works by sending out free seed packets to members who pay an annual subscription, currently £16. Membership gets you six packets of your choice plus an optional lucky dip. The quantities are not large ... typically 10 or 20 seeds, and while that's not a problem with things like tomatoes and beans it can be a little frustrating with peas, because 10 seeds is not enough for a proper crop and you have to spend the first year just growing them for next year's seed and not eating them (well, a few maybe). But that's kind of the point really, they want to encourage you to save your own seed, and I've no complaints because the work they do is priceless and they have rescued many very rare and precious vegetable varieties from extinction. They have also enabled me to grow some wonderful things which were completely unavailable elsewhere and which have really wowed me with their colours and flavours. All hail the Heritage Seed Library!

Seed diversity in pinky-purple heritage peas: Salmon Flowered, Carruthers' Purple Podded, Kent Blue, Clarke's Beltony Blue.

This year my choice is slightly restricted by my impending trial of purple peas. Although several strains of purple-flowered and purple-podded pea are now available commercially in the UK (I've been buying them up for months in readiness), the HSL maintains a number of non-commercial and heirloom varieties which differ in various ways from the readily available ones and I'm naturally keen to get get my hands on those. So peas have made up most of my HSL order for this year.

I've gone for two full-blooded purple-podders: Carruthers' Purple Podded and Clarke's Beltony Blue, both of which originate from Northern Ireland. The former has a lot of variation in its seed colour along with a small and variable amount of purple speckling, which none of my other purple podded varieties have. Hopefully they will both be included in the trial this season, although with only 10 seeds of each the priority will be bulking up seed production, so I may not get to do much in the way of taste tests.

Not purple-podded but still displaying interesting manifestations of anthocyanin pigment are Salmon Flowered, a green-podded bicolour pink-flowered variety unlike any other culinary pea I've ever seen and whose seeds are very attractive and speckly, and Kent Blue, a variety from ... er ... Kent which has bicolour purpley-blue flowers and unusual dark seeds. Both are round-seeded varieties, which means they are hardier than 'normal' peas but probably not as sweet.

I also grabbed a tall voluptuous white flowered/green podded pea called Magnum Bonum which dates from the 1860s and has been on my wish list for a while.

Ever the legume enthusiast, I've also been collecting more heritage French beans (with no idea where I'm going to put them all) of various sizes and colours. The HSL were able to supply me with Vermont Cranberry, and others I'll be trying out include Caseknife, Brighstone, Early Warwick, Coco Bicolour, Pea Bean and Canadian Wonder. Yum yum.

Early Warwick, Pea Bean, Vermont Cranberry and Coco Bicolour

Friday, 25 August 2006

A seed saver's guide


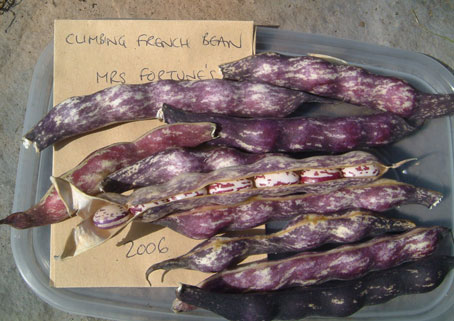
Since we're getting into that time of year again, I thought it might be useful to put together a quick and simple guide to vegetable seed saving, since this sort of info is rarely found in gardening books. Most things can be home-saved, and it not only saves money but helps to maintain long-term biodiversity. As more and more traditional open-pollinated varieties disappear from the catalogues to be replaced by overpriced and overhyped hybrids, you could find yourself looking after a variety that's no longer available and helping to keep it from extinction. Like the lovely maroon and white beans shown above, an heirloom variety which is unavailable to buy.

When you save seed from year to year though, things can get more complicated. If you've read my post about F1 hybrids you may remember that plants fall into two basic types when it comes to reproducing. Inbreeders are happy to self-pollinate to kingdom come and show no ill-effects from it. Seed from a single plant, or even a single pod, can be enough to keep the variety going. Outbreeders are designed to cross-pollinate with other plants and need lots of genetic diversity. Without it they succumb to inbreeding depression ... within a few generations they start to lose their health and vigour. To avoid this you need to save seed from a number of plants, not just one or two. They will also often cross-pollinate with other compatible plants growing nearby so if you want to keep a variety true from seed you may need to isolate them from other similar crops.

So isn't it more hassle than it's worth to save seed from outbreeding crops? Not really, no. Because over the years you'll be selecting seed from the plants which grow best in your garden, and will gradually develop your own sub-strain which is optimised for your growing conditions. For this reason home-saved seed often does better than the stuff you buy (in America, commercial seed may have originated in a different zone with very different conditions ... while most seed sold in the UK is not produced in the UK at all).

F1 hybrid plants sometimes produce sterile seed, or no seed at all. And when they do produce viable seed it doesn't come true to type. The usual advice is not to save seed from F1 hybrids. If you're interested in plant breeding though, or just enjoy the element of surprise, you can ignore that advice. The resulting plants may turn out nothing like the parents, and may initially be inferior, but you'll have all sorts of brand new and possibly unique genetic combinations to choose from, and you're a step closer to producing a new open-pollinated variety.

Storage of seed is a whole subject in itself, but for year-to-year seed saving (as opposed to long-term storage) you can just dry them out as much as you can and store them in paper envelopes. I usually place each envelope inside a self-seal bag too.

OK, here we go:

Beans, French
Leave the pods on the vines for as long as possible, until they are dry or at least until they start to change colour. Then harvest them and dry them out further indoors. To hasten drying you can split the pods open, but try to leave the beans attached. When the pods are dry and brittle, shell out the beans.

Pollination issues: Strongly inbreeding and self-pollinating, so you can save seed from a small number of plants and grow different varieties close together with no problems.

Beans, Runner
Same method as for French beans.

Pollination issues: A rampant cross-pollinator, so keeping varieties true to type is almost impossible on allotments and where neighbours are growing them. If you need to keep them pure, hand-pollinate and bag up individual flower clusters to keep the bees out. If you're not bothered by a bit of genetic diversity though, don't worry about it.

Beetroot and chard
Beets and chards are biennial and normally go to seed in their second year. The seeds grow on long straggly spikes and take ages to mature. You can pick them off individually as they turn brown, or wait until they're nearly all brown, cut the whole spikes and run a gloved hand along them.

Pollination issues: Strongly outbreeding ... grow at least 16 plants to keep a healthy diversity. Beetroot, chard and leaf beet will all cross-pollinate with each other! To avoid this, grow only one type for seed at any one time. The pollen can travel up to five miles, so if purity is essential you'll need to bag up individual flower spikes.

Brassicas
Not the easiest to save for seed. Most flower in the second season. The long thin seed pods fall to bits very readily when they're ripe, and are likely to be ransacked by birds. The easiest solution is to cut the flower stalks as soon as they reach maturity and hang them upsidedown indoors with a paper bag over them to catch the little round seeds as they fall from the pods.

Pollination issues: Strongly outbreeding ... most can't self-pollinate and are prone to inbreeding depression. You really need to grow around 20 plants, if you have the space. They also cross-pollinate like mad, so isolation is needed to keep varieties true.

Garlic
Garlic is a plant that no longer bothers to set seed in the conventional sense. It's normally propagated by dividing and replanting the cloves. Save healthy bulbs from the regular harvest and leave them intact until planting time (autumn).

If you allow garlic to flower it will produce a huge number of bulbils in the flower head instead of seed. These are essentially miniature cloves and can be saved for planting. They take two years to produce full-size bulbs, but have the advantage that they're less likely to carry diseases. Cross-pollination is not an issue because the bulbils are produced asexually and are therefore genetically identical to the parent plant.

Lettuce
Seeds produce little white tufts, like thistles, when they're mature. They tend to mature at different times, so collect them regularly as they ripen. Allow them to dry indoors until very brittle then rub off and remove the fluffy tufts.

Pollination issues: Inbreeding. Seed can be saved from just one or two plants. They don't usually cross-pollinate, but to be on the safe side grow different varieties a few feet apart.

Onions and leeks
Flowering in the second year, onions and leeks produce beautiful spherical seedheads. Allow them to ripen until the seed capsules start to go pale and papery (they will probably all mature at different times), then cut the flower head and hang it upsidedown in a paper bag in a dry place.

Pollination issues: Strongly outbreeding, and need plenty of pollination partners ... try to grow at least 16 plants. Onions and leeks will readily cross-pollinate with others of their own type but not with each other, though onions may cross with shallots. To maintain pure varieties grow only one type for seed at any one time (you can still grow other varieties for eating, since those won't be flowering).

Peas
Same as for beans really; allow the pods to dry for as long as possible on the plant and shell them out when the pods are brown and crisp.

Pollination issues: Strongly inbreeding, so there are no problems with saving seed from just a few pods, and they're unlikely to cross-pollinate even when grown close together.

Potatoes
To save tubers for next year's crop, select them at harvest time and keep them in a cool, dark, frost-free place over winter. Select only firm and healthy tubers, which ideally should be about the size of a hen's egg. Leave them in a bright sunny place for a few days before storing them, which helps to toughen the skins and keep them dormant. Check them from time to time over the winter and chuck out any that are going soft or mouldy.

Some potato varieties will set top fruit which contain true seeds, and these can be saved too. If your plants have produced "apples", collect them when they're just starting to soften and are ready to drop from the plant. Process them in the same way as tomatoes (though the stinky fermentation process shouldn't be necessary ... just wash them thoroughly in a sieve to remove the pulp).

Pollination issues: Potato flowers cross-pollinate fairly readily, but in practice so few of them produce viable pollen it's unlikely to be an issue. Even when self-pollinated though, they will not come true from seed (because they have a slightly eccentric arrangement of chromosomes). Each one you plant will be effectively a new variety. Conversely, plants grown from tubers are genetically identical to the parent plant.

Squash (pumpkins, marrows etc)
The seeds are so huge you can't miss 'em. It's usually best to leave the fruits to ripen for a few weeks after harvest before collecting the seeds, or just leave them until you're cutting them up for eating. Wash the seeds to remove bits of pulp and fibre, then spread them out on a plate to dry thoroughly.

Pollination issues: Outbreeding, and will cross-pollinate with any other squash of the same species. Unlike most outbreeders though, it's not prone to inbreeding depression ... so you can get away with saving seed from just a few plants ... 6 or so will do.

Sweetcorn
Saving seed from sweetcorn is not really practical unless you have room to grow a lot of it!

Leave the cob (ear) on the plant for as long as possible or harvest when it's mature and bring it indoors to dry. When it's completely dry, the kernels can be removed by rubbing two cobs together.

Pollination issues: Extremely outbreeding! More prone to inbreeding depression than just about any other vegetable, and even sowing just one generation of inbred plants can result in an inferior crop. To be sure of maintaining health and vigour you need to grow and keep seeds from about 200 plants. Gulp.

Sweetcorn is wind-pollinated and produces stupendous amounts of pollen which is then cast to the four winds. To keep a variety pure it needs to be isolated from other varieties by some considerable distance.

Tomatoes
The 'proper' way to save tomato seeds is to scrape the seeds (including the gooey gel stuff) from ripe fruits into a small container, maybe add a tiny splosh of water, and leave it to ferment for a few days. During this time it will produce a crust of disgusting mould and a stench which could put you off tomatoes for life. When all the gel has dissolved away, rinse the seeds thoroughly in a sieve under running water and then leave them to dry for several days. Stir them around regularly to prevent them sticking together.

An alternative and much less stinky method is to scrape the seeds out onto a sheet of kitchen roll, spread them out to separate them and leave them to dry. The gel acts as a glue and sticks them to the sheet. I've heard this method criticised because the gel also acts as a germination inhibitor ... but in my experience the seeds germinate fine, even after several years.

Pollination issues: Strongly inbreeding. Saving a single fruit is enough, although more is better. Cross-pollination can happen but usually doesn't. If you want to be sure of pure varieties, isolate the plants from other types as far as you can.

Monday, 7 August 2006

Today in the garden ... harvest time

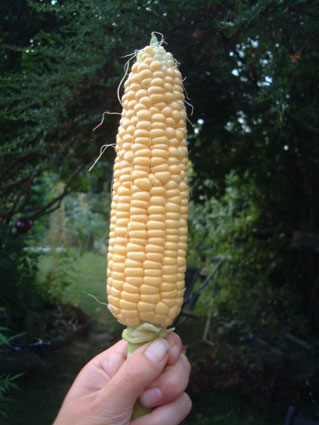
Just showing off my Swift F1 sweetcorn, which is as big as any supermarket cob and far tastier. Not bad for a crop which supposedly doesn't appreciate the British climate

I've had a lot of catching up to do after my time away ... lots of weeding, deadheading and propping up things that have collapsed under the weight of their own abundance.

You may remember I've been ripening up a potato apple I found on one of my Marfona plants. Well, it's about as mature as it's going to get so it's time to extract the seeds from it.

There's precious little information out there about raising new potato plants from seed because not many people do it ... but it's basically the same as for tomatoes. The advantage of growing potatoes from seed is that they are likely to be free from any virus (unlike tubers, which store viruses very efficiently!) and it's also a voyage of discovery because every seed is potentially a new variety, with no two being quite the same.

Just slice open the ripe potato apple (it's ripe when it just starts to go soft) and scrape the seeds out into a container of water. Any seeds that float are not viable and can be got rid of. Wash the sinkers to remove all the pulpy goo (a sieve or tea-strainer is probably the best way to do it) then spread them out to dry thoroughly.

As they're not hardy, I'll have to wait until the spring before I can sow them.

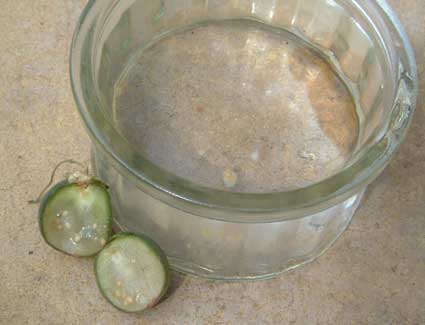
Marfona potato apple: it looks like a tomato from the outside ... and it's not dissimilar on the inside too. The seeds look like small tomato seeds and are easy to extract in a jar of water.

At last, one of my F1 hybrid experimental peas has germinated! I'm so relieved. It was one of the ones I sowed fresh from the pod into high quality coir and vermiculite. I've also got another batch started off in bog-roll tubes as per my usual method, and I'll see what happens to those. These are ones which I'd allowed to dry out before sowing them ... I want to see whether that makes a difference.

At this time of year lots of stuff is ready to harvest. I pulled up the Hysam onions today as it's been a couple of weeks since their foliage flopped over, so they're about ready.

Hysam onions drying in the sunshine

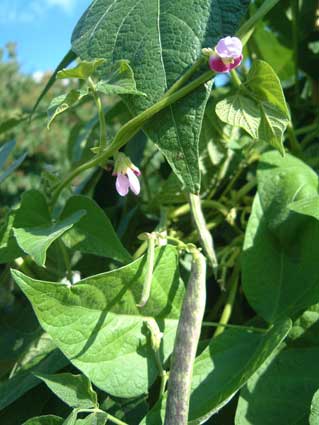
I've got more French beans than I know what to do with, and I've started to let Mrs Fortune's develop mature beans rather than keeping on picking the young pods. The plants have rather cheekily lashed themselves around some adjacent bamboo frames, having outgrown their own (7ft) supports, and are trying to take over the garden by stealth. I now have funny little blue-streaky pods growing among the tomatoes ...

Mrs Fortune's climbing bean is hard to beat if you want high yields and rampant vigour

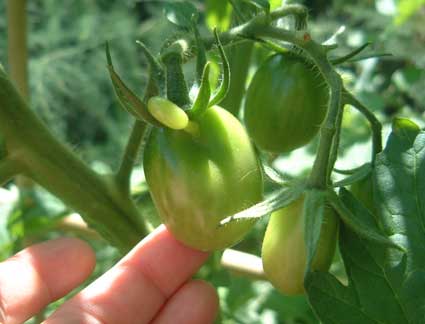
And there's more weirdness among the tomatoes. I notice one of the developing fruits on Black Plum has a strange appendage growing out of it. Not sure if it's trying to grow into a spare tomato or what. Anybody else had something like this?

Black Plum also has the distinction of being the healthiest and most rampant of all the tomato varieties I'm growing ... it's already over the top of the bamboo frame I made for it way back when. At the other end of the spectrum, my Pink Jester plants are looking very straggly and distorted and two of the three plants have elongated fruits which are not true to type. I dunno why that is, because they're from the same batch of seed I've sown for the last few years. They're oddly elongated with pointy tips, like peppers. Very curious.

Strange knobbly sticky-outy bit on a Black Plum tomato ... hmmm!

Friday, 28 July 2006

More pea-related ramblings

Sweet peas growing through the sagging remains of my Alderman crop. I'm a great believer in mixing up pretty flowers among the veg. For most things it encourages better pollination, although peas don't need bees so in this case it's purely decorative.

I've had grovelling apologies from both my next door neighbours today. Mrs Leafblower apologised after she accidentally hosed me down while watering a capacious shrub growing against the lattice fence which separates our gardens, having not noticed me crouched down sowing seeds on the other side of it. Then the other neighbour's mum came round to apologise for an incident early this morning when her son's dog spotted a cat in our front garden (not one of ours) slipped his leash and came charging through the hedge in pursuit. Fortunately for the cat, this dog is endowed with a peculiarly short attention span and only got half way across the garden before stopping to crap on the lawn.

Despite all this excitement I managed to get the Alderman peas planted out in the former potato bed. The soil has fluffed up a treat after having a sack of horse manure dug into it. I've put in a row of canes for them (for stability) and a few prunings from the Ceanothus tree for them to hang on to. This seems to be extremely important for peas, getting the 'pea sticks' in straight away; they know when they've got something twiggy to get their tendrils round and respond accordingly. If you don't provide them with twigs, they sit there and sulk.

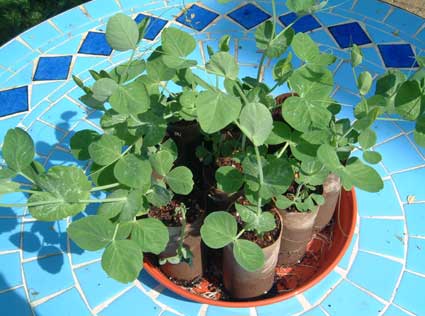
I've had a lot of failed pea crops in the past, and have had to experiment a bit to find a method of growing them which works for me. It may not work for anyone else, of course. But this is what I do. I put eight or ten bog-roll tubes on a large saucer (if I need to label the varieties I write on the tubes with a marker pen) and stuff them firmly but lightly with compost made from coir, sand and perlite. I don't bother being precise about proportions of different ingredients ... I try to trust my gut instinct with it. But I recently upped the perlite quota substantially after most of my precious Champion of England seeds rotted off ... it helps keep the mixture open and aerated. I keep space between the tubes too to allow air to circulate around them (otherwise they're prone to going mouldy). I sow two seeds in each tube.

Champion of England. It's tall.

The trouble with pea seeds is that they rot very easily, but still need plenty of moisture to germinate. Getting the balance right so that they survive the germination stage can be quite tricky. What I tend to do is keep the bottom of the saucer regularly topped up with water, without letting it build up to the point where the tubes are left standing in water. If they need the water, they soon suck it up. I usually water them several times a day in this manner. Watering from the base is the key though; it keeps the area around the seed relatively dry while encouraging the roots to push downwards to find the moisture. Usually the roots are poking out the bottoms of the tubes within a few days (and at that stage it's even more important to keep them well watered so that the roots don't dry out and die off). I still get the odd seed going mouldy but on the whole this method works pretty well for me.

And incidentally, I'm not just being a cheapskate here: I rate ordinary bog-roll tubes more highly than the purpose-made root-trainers you can buy in garden centres. They're sturdy, porous and biodegradable. All lavatorial cardboard in our house is assiduously collected throughout the year for this purpose.

My Alderman seedlings, well rooted and ready to make a bid for freedom

I'm currently trying to persuade my home-saved seed to germinate, but most of it is rotting off before it even thinks about sprouting. I'm not sure whether this is anything to do with sowing it fresh (I had no problems at all with the Alderman seeds which were dry from a packet) or whether it's some other factor. My thinking is that it's probably the balance of moisture and temperature which is to blame. But getting that balance right is still a matter of trial and error. According to Carol Deppe, and I've no reason to doubt her, you can sow fresh peas as soon as they mature without having to dry them down first. Just soak them in water until they germinate, she says. Well, I've tried that. And no matter how regularly I refresh the water I'm just ending up with a stinky fermenting mess.

It could of course be down to the weather. Peas are a cool-climate crop and sowing them in these mad summer temperatures is not ideal. I will try my next batch in the coolest place I can find. But these hand-crossed hybrid seeds are not easily replaceable so I can't afford to keep losing them.

And for my next trick I'm trying out a plastic pot sterilised in hot water, a posh expensive coir medium mixed with a little vermiculite, and sowing the peas with just a sprinkle of vermiculite on top. In theory this should keep the seeds moist but still allow plenty of aeration. I bloody hope so anyway.

The hand-pollinations were ostensibly successful. I have several nice plump pods full of home-made F1 hybrid seeds waiting for the right moment for harvest, and have gathered in a few already. They don't generally have as many peas in them as a naturally self-pollinated pod, but that's normal.

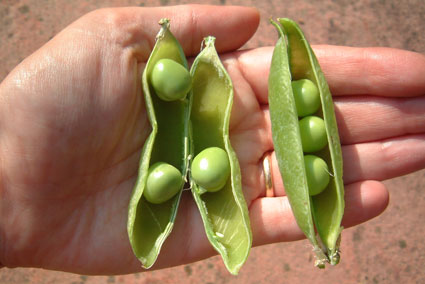
Lovely plump HUGE seeds from an Alderman x Mr Bethell's Purple Podded cross ... even if there are only three in a pod.

OK, here comes a load of nerdy botanical stuff. I've noticed that the hand-pollinated pods with the most peas in them are the ones where I left the outer sepals intact on the flower bud. When I learned to do pea pollinations I had instructions to take the sepals off first to make the tiny buds easier to handle. But I find it results in the outer petals quickly drying out and falling off, and I'm now wondering if this causes the stigma to dry out excessively. I've tried a few different variations and I'm finding that the less damage I do to the flower bud (even the parts which don't seem to matter) the more fruitful the pollination is, with the healthiest pods and largest pea numbers resulting from those where I did nothing more than cut a small slice in the keel to hoik the anthers out. I've recently discovered that removing the sepals is actually unnecessary as they're quite easy to fold back out of the way (tearing them slightly seems to do no harm). Leaving them mostly intact makes the pollination job marginally more fiddly but seems to increase the average yield from 0-3 peas per pod to something more like 6-7 per pod. Ha! Plant-breeding is a constant learning experience.

I've also, incidentally, noticed a higher success rate in the buds which I pollinated twice (emasculated and pollinated on one day and then pollinated again 24 hours later). So even though the stigma is supposedly receptive in the early bud stage, it does seem to be more receptive if you give it an extra day.

Knowing when to harvest is the biggest unknown for me at the moment, and the info I've found about saving seed from pea plants tells you to leave the pods on the plants until they're completely dried out, several weeks past the eating stage. That's all very well under optimal conditions, but it doesn't take into account the summer ravages of the dreaded pea moth. If I leave the pods on the plants until they start to go brown I'm finding them full of horrible little maggots ... a risk I can't afford to take with my precious hybrid experiments. I'm finding that the stage where the pods just start to go leathery is a good compromise.

Meanwhile, although I'll have to wait till next season to conduct a proper trial of purple-podded peas, a packet of Ezethas Krombek Blauwschok arrived this morning from Chase Organics and I've slung a few into bog-roll tubes to see if I can grab a late crop for this year. It's already clear that this variety is not the same as the ones I've already seen; the seeds are large-ish with a distinctly brown colour and many are somewhat flattened in shape. Although it's hard to be sure the colour differences are genetic rather than just down to variations in harvesting and storage, the ones I saw at the Rococo Garden had a similar flatness but were distinctly smaller and greener, while Mr Bethell's Purple Podded has larger, rounder seeds with a yellowy-green colour.

Taken a couple of weeks ago, this photo of a baby pod on Mr Bethell's Purple Podded shows how the colour starts developing just along one edge before the whole pod turns purple. This one has been hand-pollinated with Champion of England and you can see all the tiny peas inside ... the future of my breeding experiments.